Apache APISIX is primarily used to handle north-south traffic and often sits at the boundary between client applications and backend services.
With the APISIX Ingress controller, APISIX can also control the ingress-egress traffic in Kubernetes clusters with native configuration.
But as organizations embrace microservices, there is a new challenge to handle the east-west traffic between these microservices.
Service meshes like Istio solve this by removing the networking responsibility from the microservice developer, providing an additional L4/L7 networking layer.
With the new Amesh library and Istio, Apache APISIX can also be used as a service mesh, specifically as a data plane for Istio, bringing all its traffic management capabilities to service-to-service communication.
In this article, we will examine what Amesh is, how it was developed, and how it is used to bring APISIX into a service mesh.
Istio and the xDS Protocol
Istio is one of the most widely used service meshes.
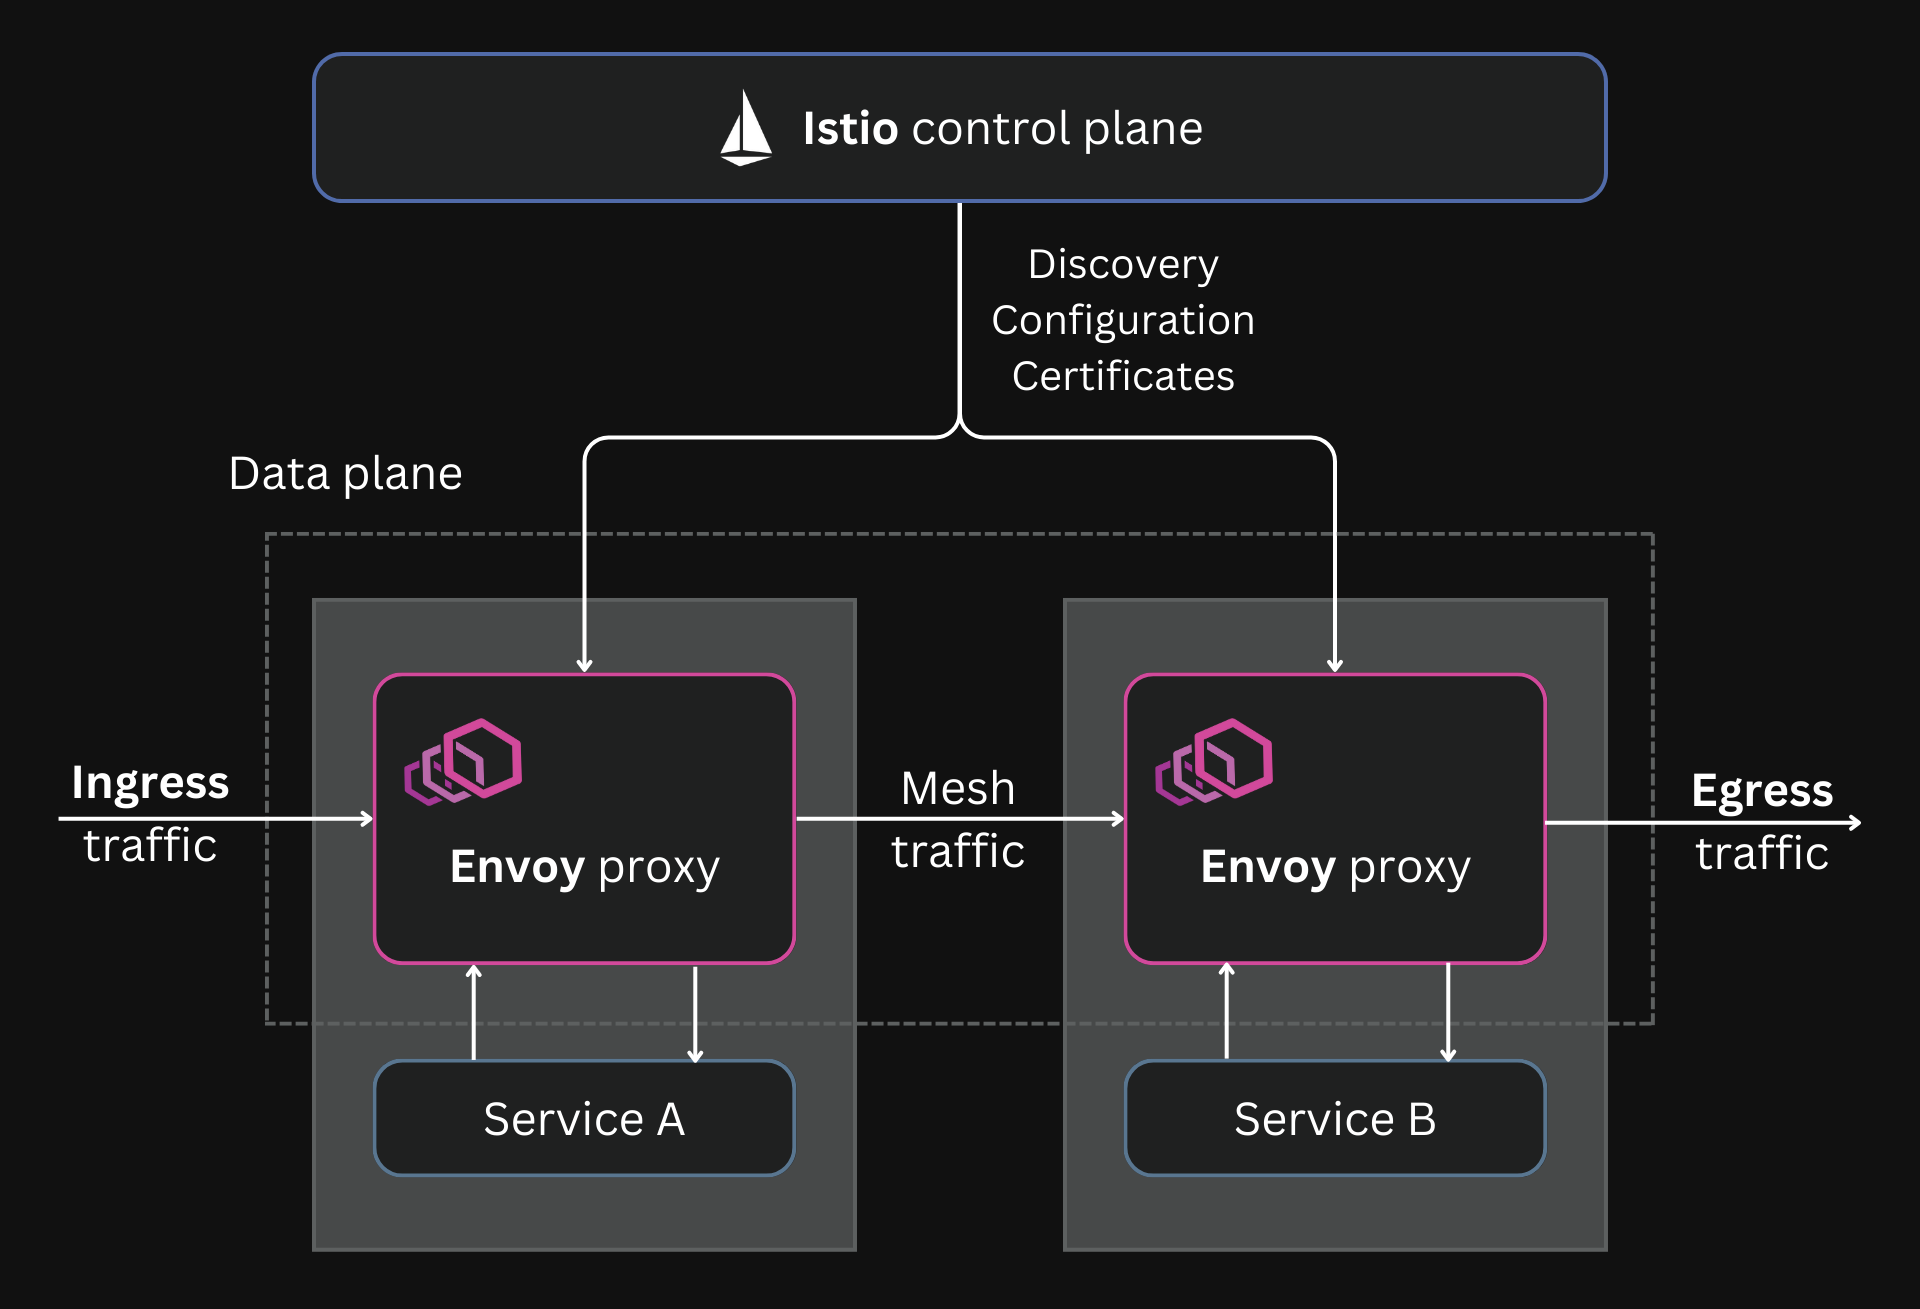
Under the hood, Istio uses Envoy as the reverse proxy in its sidecar containers.
Istio uses Envoy proxy as the data plane
Istio manages traffic by dynamically configuring the sidecars using Envoy's xDS APIs.
The xDS APIs are a way to configure Envoy with incremental changes instead of simple configurations with static files.
Although these APIs were initially intended for configuring Envoy, the APIs have evolved to become a universal data plane API. Any data plane proxy can implement these APIs, and any control plane can use this API to work with these data plane proxies.
In Istio, this means that you can replace the default Envoy data plane with any data plane that implements the xDS APIs. So you can replace Envoy with APISIX to get its traffic management capabilities in a service mesh.
But APISIX does not support the xDS APIs out-of-the-box. And that’s where Amesh comes in.
Amesh
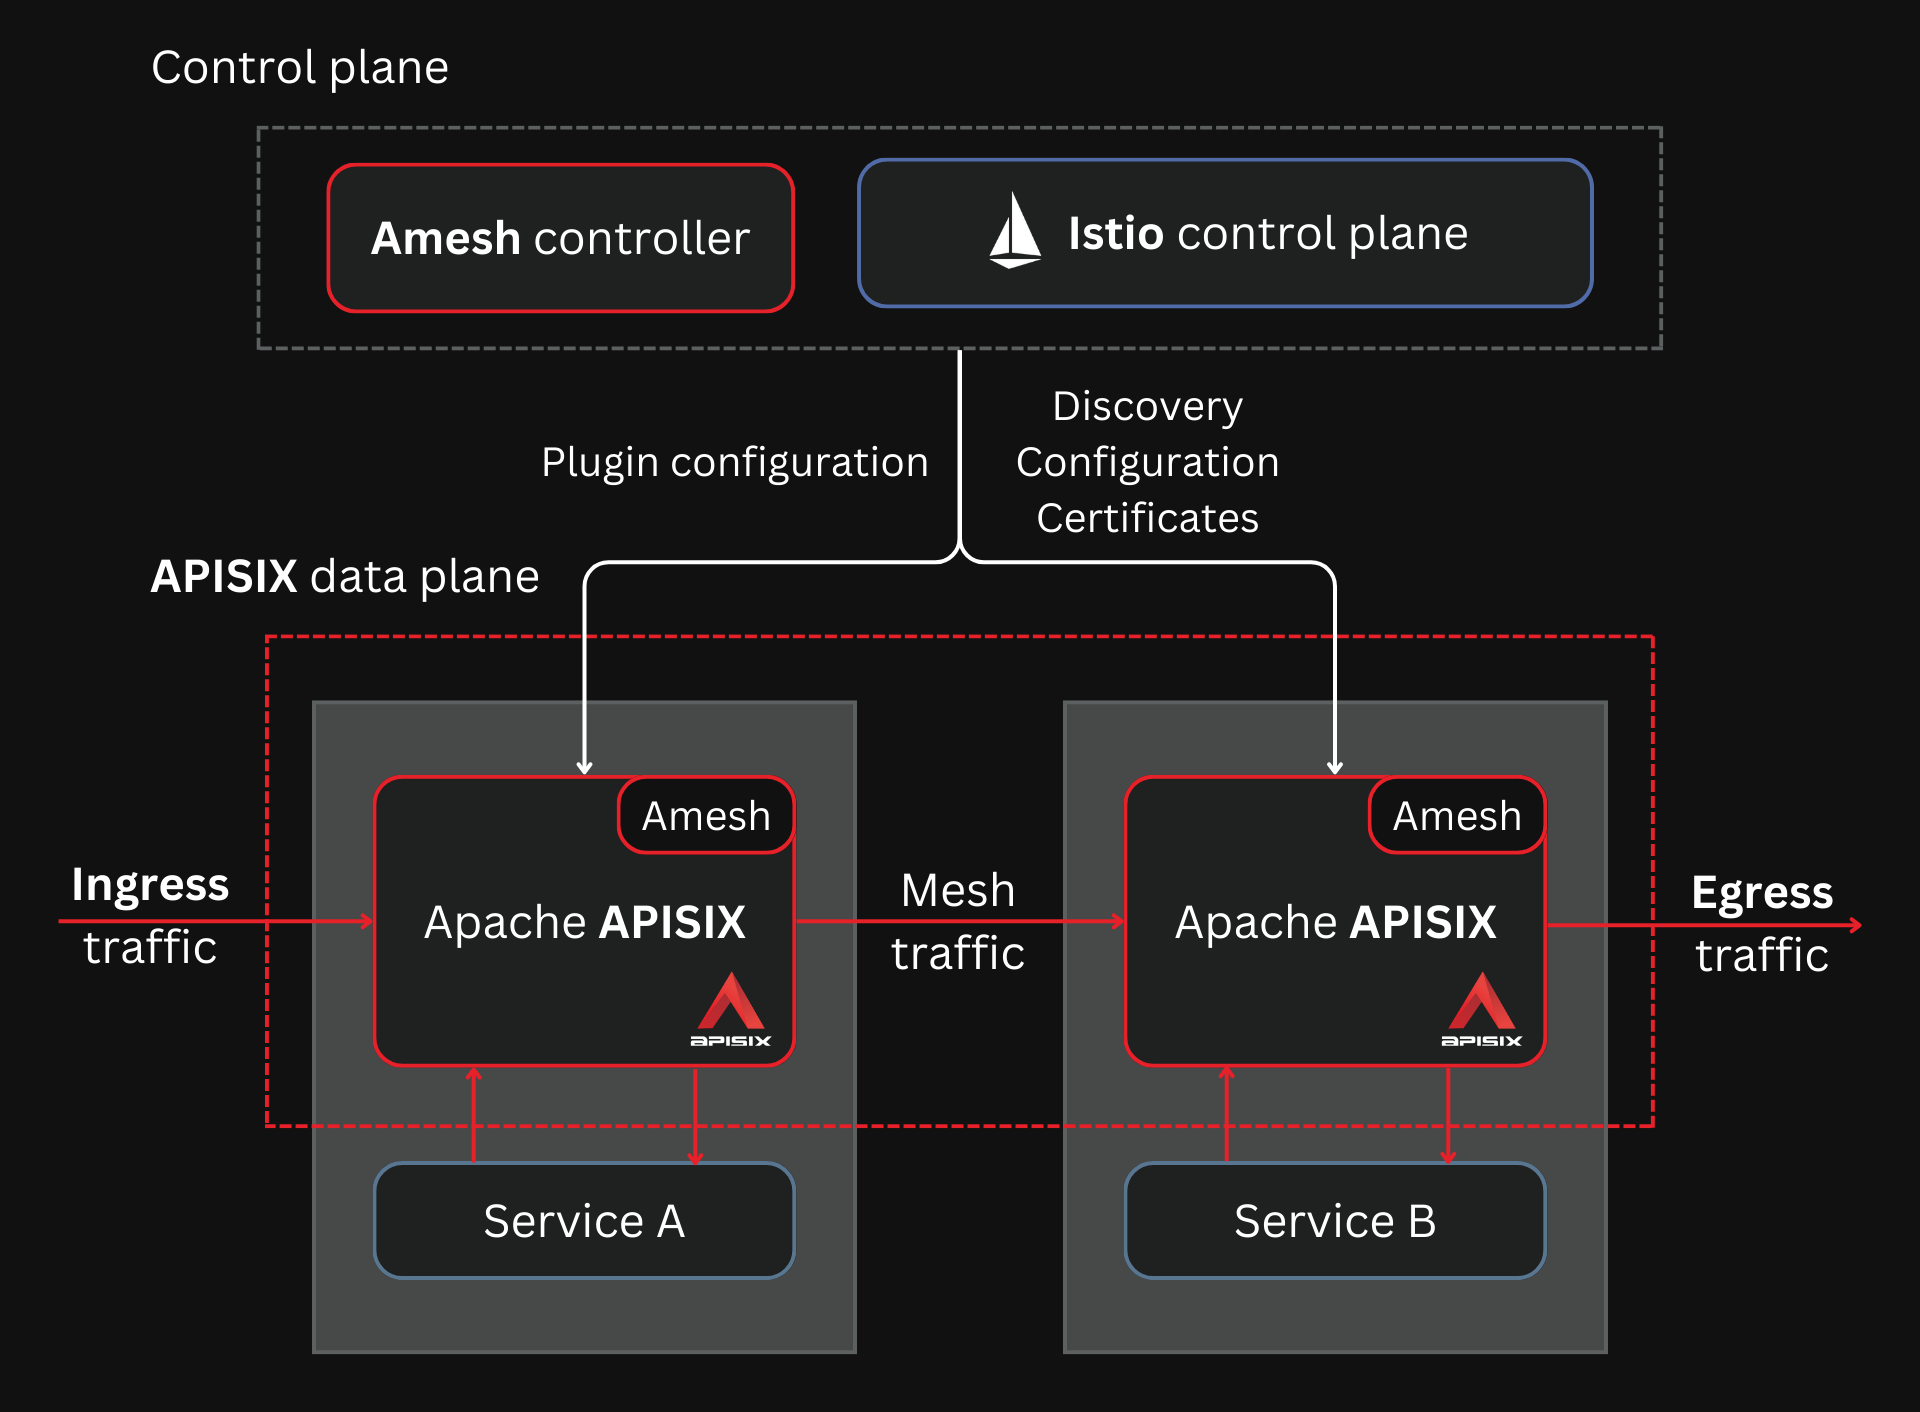
Amesh is a library that translates the data from Istio’s control plane to APISIX configuration.
APISIX replaces Envoy as the data plane for Istio
Istio communicates to the data plane through the xDS APIs. Amesh supports these APIs and then converts them to APISIX configuration.
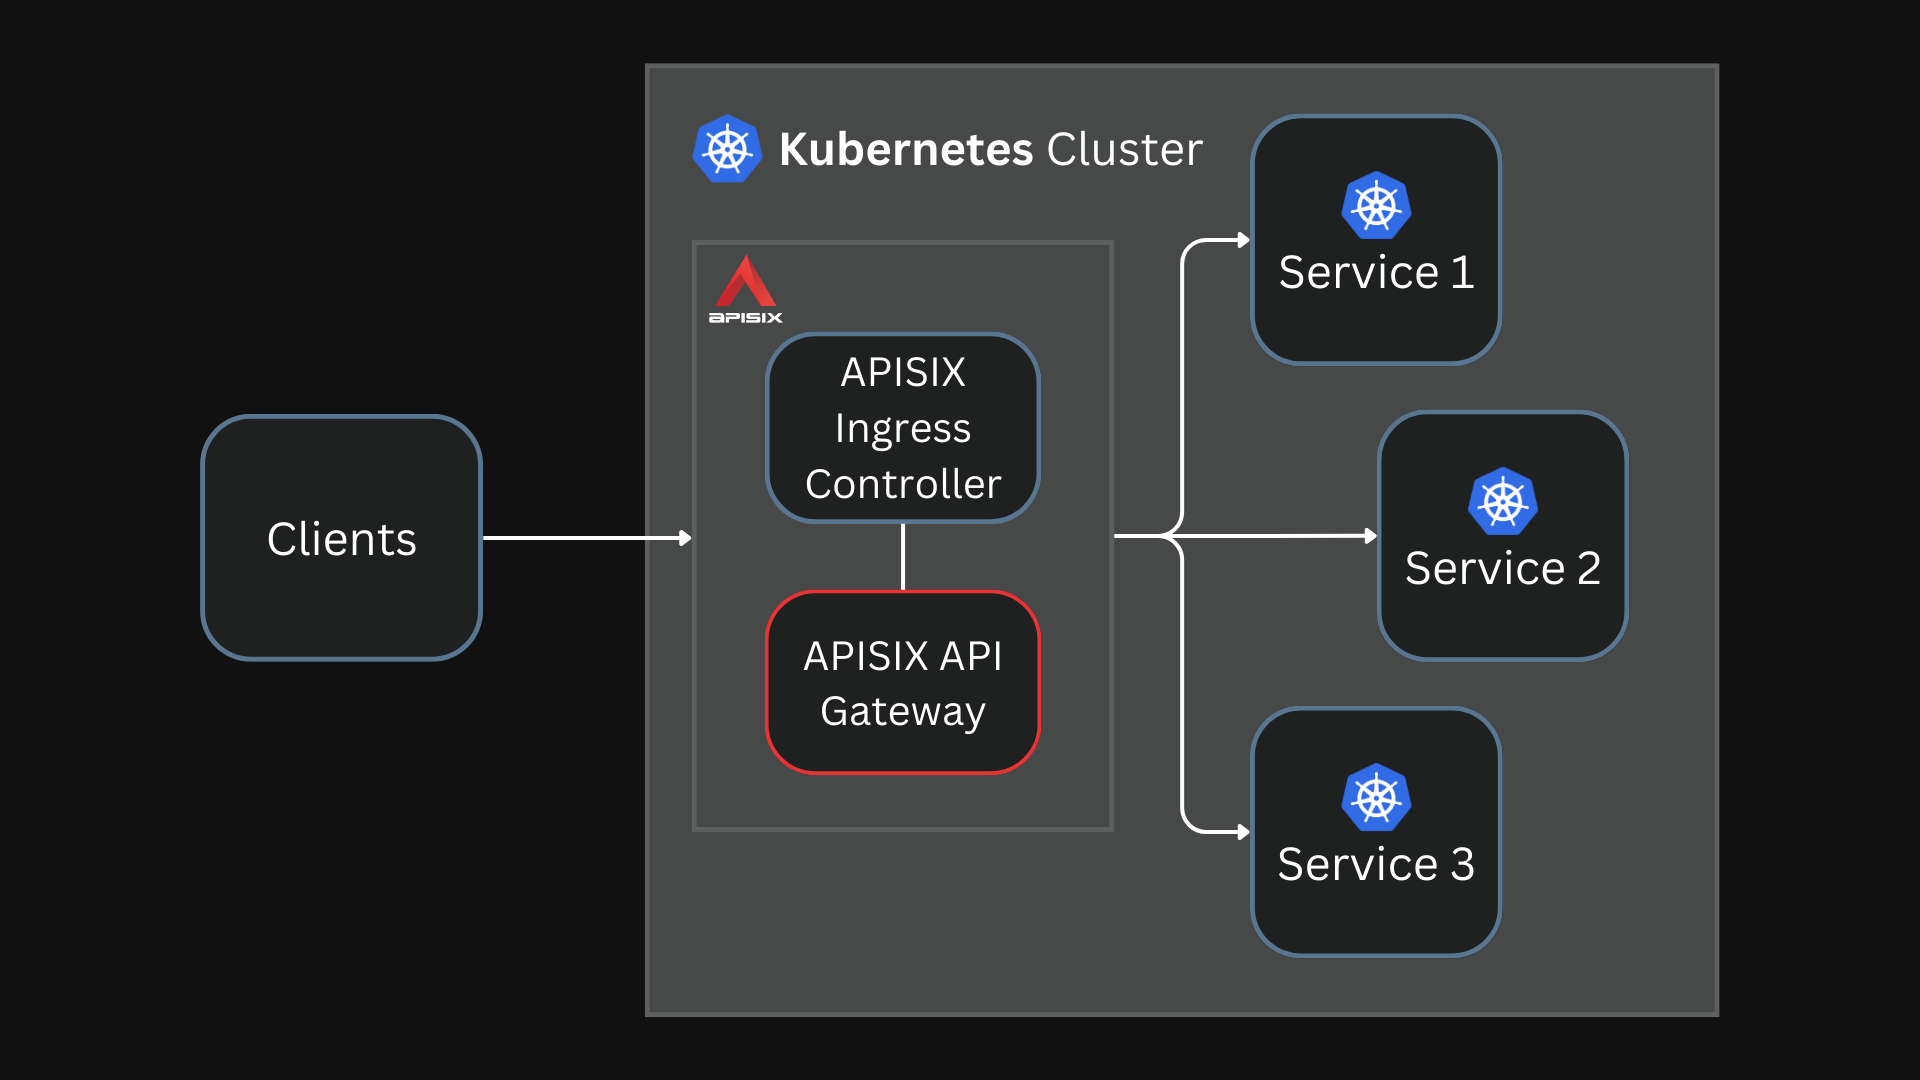
This is similar to how APISIX and the APISIX Ingress controller work. The Ingress controller converts the configurations defined using the Ingress or the Gateway API to APISIX format.
The Ingress controller translates configuration defined using the Kubernetes Ingress or Gateway APIs to APISIX configuration
Since the xDS APIs are supported by more service meshes like Linkerd and Open Service Mesh, APISIX can also work with them using the Amesh library. Amesh is still in the early stages of development and currently works with Istio v1.13.1.
With Amesh + APISIX, you can use Istio as you would typically. Once you configure traffic rules with Istio’s virtual service, APISIX can implement these rules.
APISIX’s extended capabilities come through its 80+ plugins. To use APISIX plugins with Istio, we deploy an Amesh control plane component called the Amesh controller.
The Amesh controller takes a plugin configuration defined with the AmeshPluginConfig CRD and converts it to an APISIX plugin configuration.
All of this will enable us to leverage the full capabilities of APISIX within sidecar containers.
APISIX + Istio Mesh
Let’s put everything we learned about in action.
We will build the Amesh images, configure Istio to use APISIX sidecars, deploy Istio, and test everything by running a sample application.
Building the Images
We will build three images:
- amesh-iptables: used for creating an init container to set up some iptables rules. These rules are to direct all traffic through APISIX.
- amesh-sidecar: used for creating the sidecar container.
- amesh-controller: used for creating the Amesh controller control plane component. This controller is used to configure APISIX plugins.
First, clone the Amesh repo:
git clone https://github.com/api7/Amesh.git
cd Amesh
You can build and push these images to your own registry.
Add the address of your registry in an environment variable before you run the build, as shown below:
export REGISTRY="docker.io/navendu"
make prepare-images
If you don’t want to build your own images, you can use these images:
docker pull navendup/amesh-iptables:dev
docker pull navendup/amesh-sidecar:dev
docker pull navendup/amesh-controller:latest
Deploy Amesh Controller and Install CRDs
We will use Helm to deploy everything to the Kubernetes cluster. I use minikube in these examples.
We will start by creating a new namespace istio-system:
kubectl create namespace istio-system
To deploy the Amesh controller, run:
helm install amesh-controller -n istio-system \
./controller/charts/amesh-controller
You also need to install CRDs to work with the Amesh controller:
kubectl apply -k controller/config/crd/
Configure and Deploy Istio + APISIX
Before deploying the service mesh, we will set some environment variables:
export ISTIO_RELEASE=1.13.1
export REGISTRY="docker.io/navendup"
Then we will use Helm to deploy the service mesh:
helm install amesh \
--namespace istio-system \
--set pilot.image=istio/pilot:"$ISTIO_RELEASE" \
--set global.proxy.privileged=true \
--set global.proxy_init.image="$REGISTRY"/amesh-iptables:dev \
--set global.proxy.image="$REGISTRY"/amesh-sidecar:dev \
--set global.imagePullPolicy=IfNotPresent \
--set global.hub="docker.io/istio" \
--set global.tag="$ISTIO_RELEASE" \
./charts/amesh
Now we have the service mesh and Amesh controller deployed. Next, let’s deploy a sample application to test our service mesh.
Deploying Bookinfo
We will use Istio’s Bookinfo sample app.
First, we will add a label to the default namespace to automatically inject sidecars to any pod in the namespace:
kubectl label ns default istio-injection=enabled
Then we can deploy Bookinfo by running:
kubectl apply -f e2e/bookinfo/bookinfo.yaml
This will spin up the Bookinfo application, and each of the pods will have APISIX sidecars:
output$ kubectl get pods

NAME                              READY   STATUS    RESTARTS   AGE
details-v1-79f774bdb9-cbn87       2/2     Running   0          55s
productpage-v1-6b746f74dc-tntc8   2/2     Running   0          55s
ratings-v1-b6994bb9-r5j45         2/2     Running   0          55s
reviews-v1-545db77b95-n657s       2/2     Running   0          55s
reviews-v2-7bf8c9648f-zn97s       2/2     Running   0          55s
reviews-v3-84779c7bbc-wn8k2       2/2     Running   0          55s
Testing the Mesh
To access the Bookinfo application, we would need an ingress gateway.
You can use APISIX for this ingress gateway, but that’s for another time. For now, we can just use port-forward to access the product-page service:
kubectl port-forward productpage-v1-6b746f74dc-tntc8 9080:9080
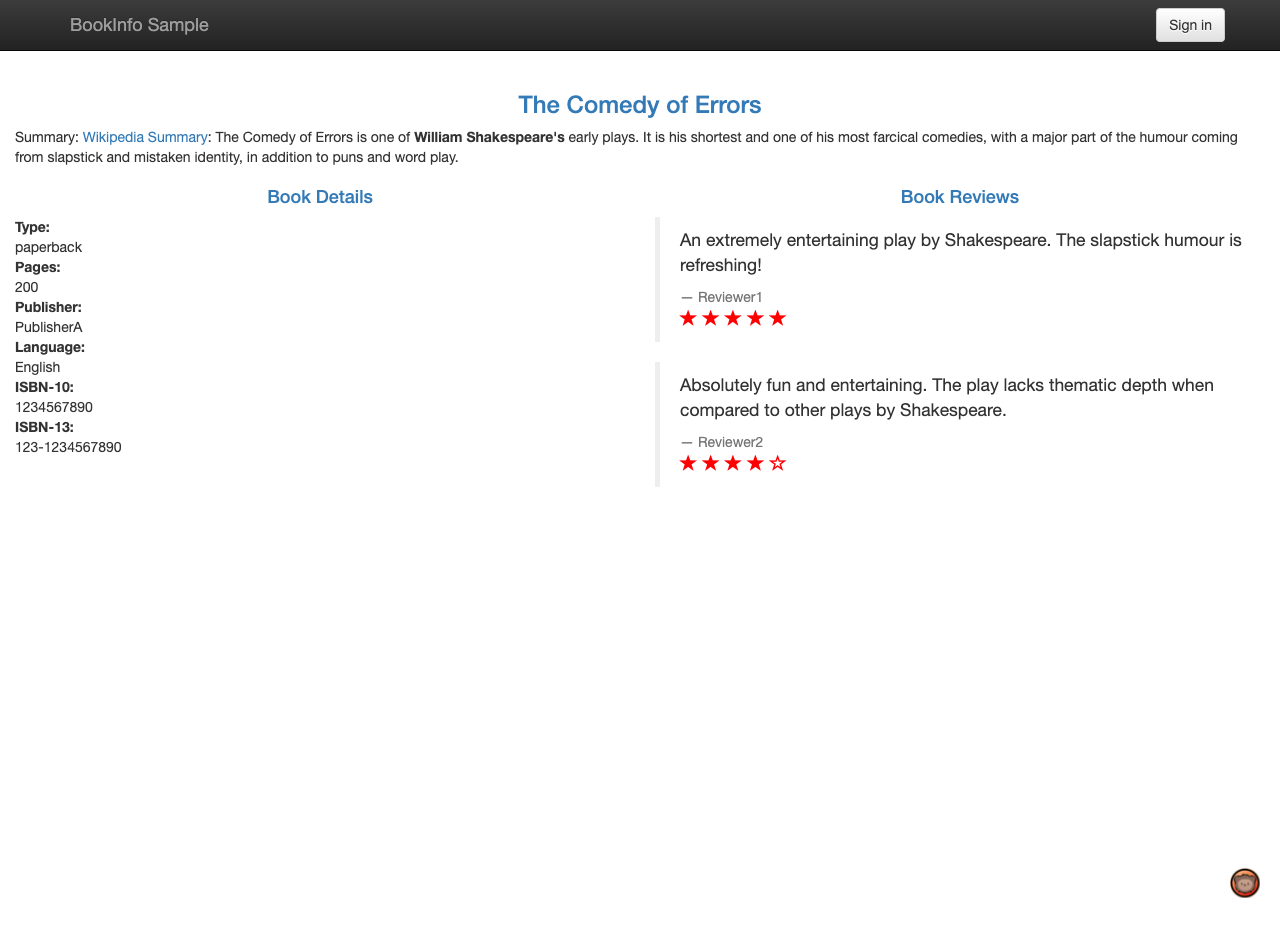
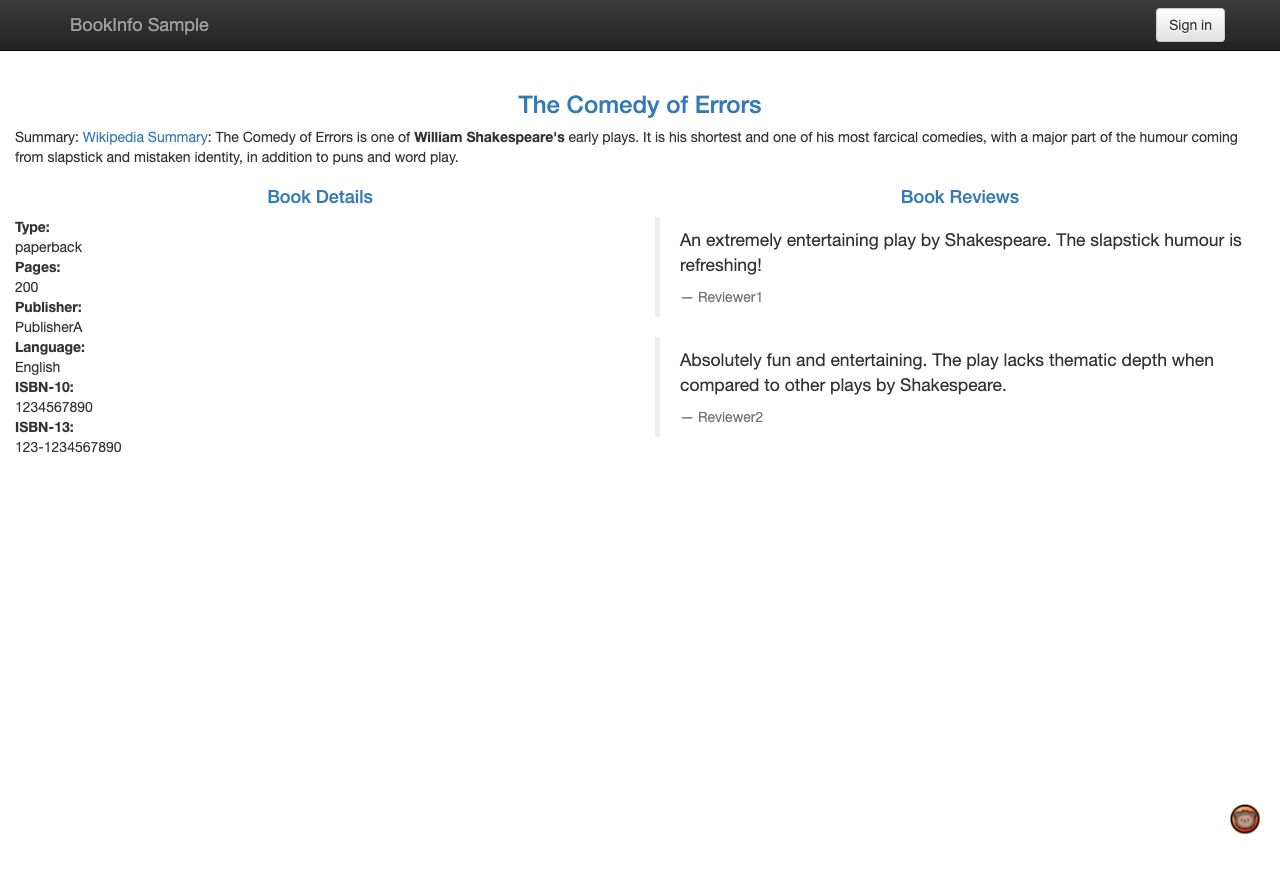
Now if we open up localhost:9080, we will be able to see our sample application.
This uses the reviews-v3 service. If you refresh the page, it will cycle through the reviews service
Now let’s apply a rule using virtual services that routes all traffic to v1 versions of the services.
The rule is self-explanatory, and it would look like this:
virtual-service-all-v1.yamlapiVersion: networking.istio.io/v1alpha3
kind: VirtualService
metadata:
  name: productpage
spec:
  hosts:
  - productpage
  http:
  - route:
    - destination:
        host: productpage
        subset: v1
---
apiVersion: networking.istio.io/v1alpha3
kind: VirtualService
metadata:
  name: reviews
spec:
  hosts:
  - reviews
  http:
  - route:
    - destination:
        host: reviews
        subset: v1
---
apiVersion: networking.istio.io/v1alpha3
kind: VirtualService
metadata:
  name: ratings
spec:
  hosts:
  - ratings
  http:
  - route:
    - destination:
        host: ratings
        subset: v1
---
apiVersion: networking.istio.io/v1alpha3
kind: VirtualService
metadata:
  name: details
spec:
  hosts:
  - details
  http:
  - route:
    - destination:
        host: details
        subset: v1
---
You can apply it to your cluster by running:
kubectl apply -f https://raw.githubusercontent.com/istio/istio/release-1.18/samples/bookinfo/networking/virtual-service-all-v1.yaml
Now if we go back to our application and hit refresh, it will stop cycling through the multiple versions of the reviews service and will only route to the v1 version.
Notice how the look of the reviews section changed here. It will remain the same even if you refresh the page
To summarize, we configure a rule in Istio, and Istio implements it using its sidecar containers with Apache APISIX. Neat!
Amesh Beyond
Amesh is an experimental project, and it is still in its infancy.
Future versions of the project aim to support more features through virtual services.
You can contribute to improving the project or keep track of new versions on GitHub.
Thank you for reading "APISIX Service Mesh."
Subscribe via email or RSS feed to be the first to receive my content.
If you liked this post, check out my featured posts or learn more about me.

