

I have been using my MacBook Air M1 for almost four years. During this time, my development environment evolved primarily by installing things at random. While some of these have proven valuable in my development workflow, most of my install spree was accumulating bloat.
When I had some time last month, I decided to change this and rebuild my development environment from scratch. My goal was simple: have a minimal and functional setup. And because I’m more opinionated now than when I first started programming professionally, I was armed with a better arsenal to tackle this problem.
This post documents my complete setup, which I primarily use to write code. Feel free to jump to specific sections from the table of contents above as needed.
iTerm2
Regular readers of this blog will not be surprised to learn that I pretty much live in the terminal. The most appropriate first step for a terminal dweller is to replace the default macOS Terminal app with iTerm2.
iTerm2 is widely used, has a lot of customization options, and, most importantly, is much better than the default Terminal app. It has been my go-to choice for a terminal emulator on macOS for a while.
My go-to color theme to rice things up is Catpuccin. Catpuccin has an official theme for iTerm2, and I also use it everywhere possible.
Besides a custom color theme, I also installed the Nerd Font patch of the JetBrains Mono font. Nerd Fonts contains additional glyphs used in many terminal applications to visually represent stuff. It’s a must install.
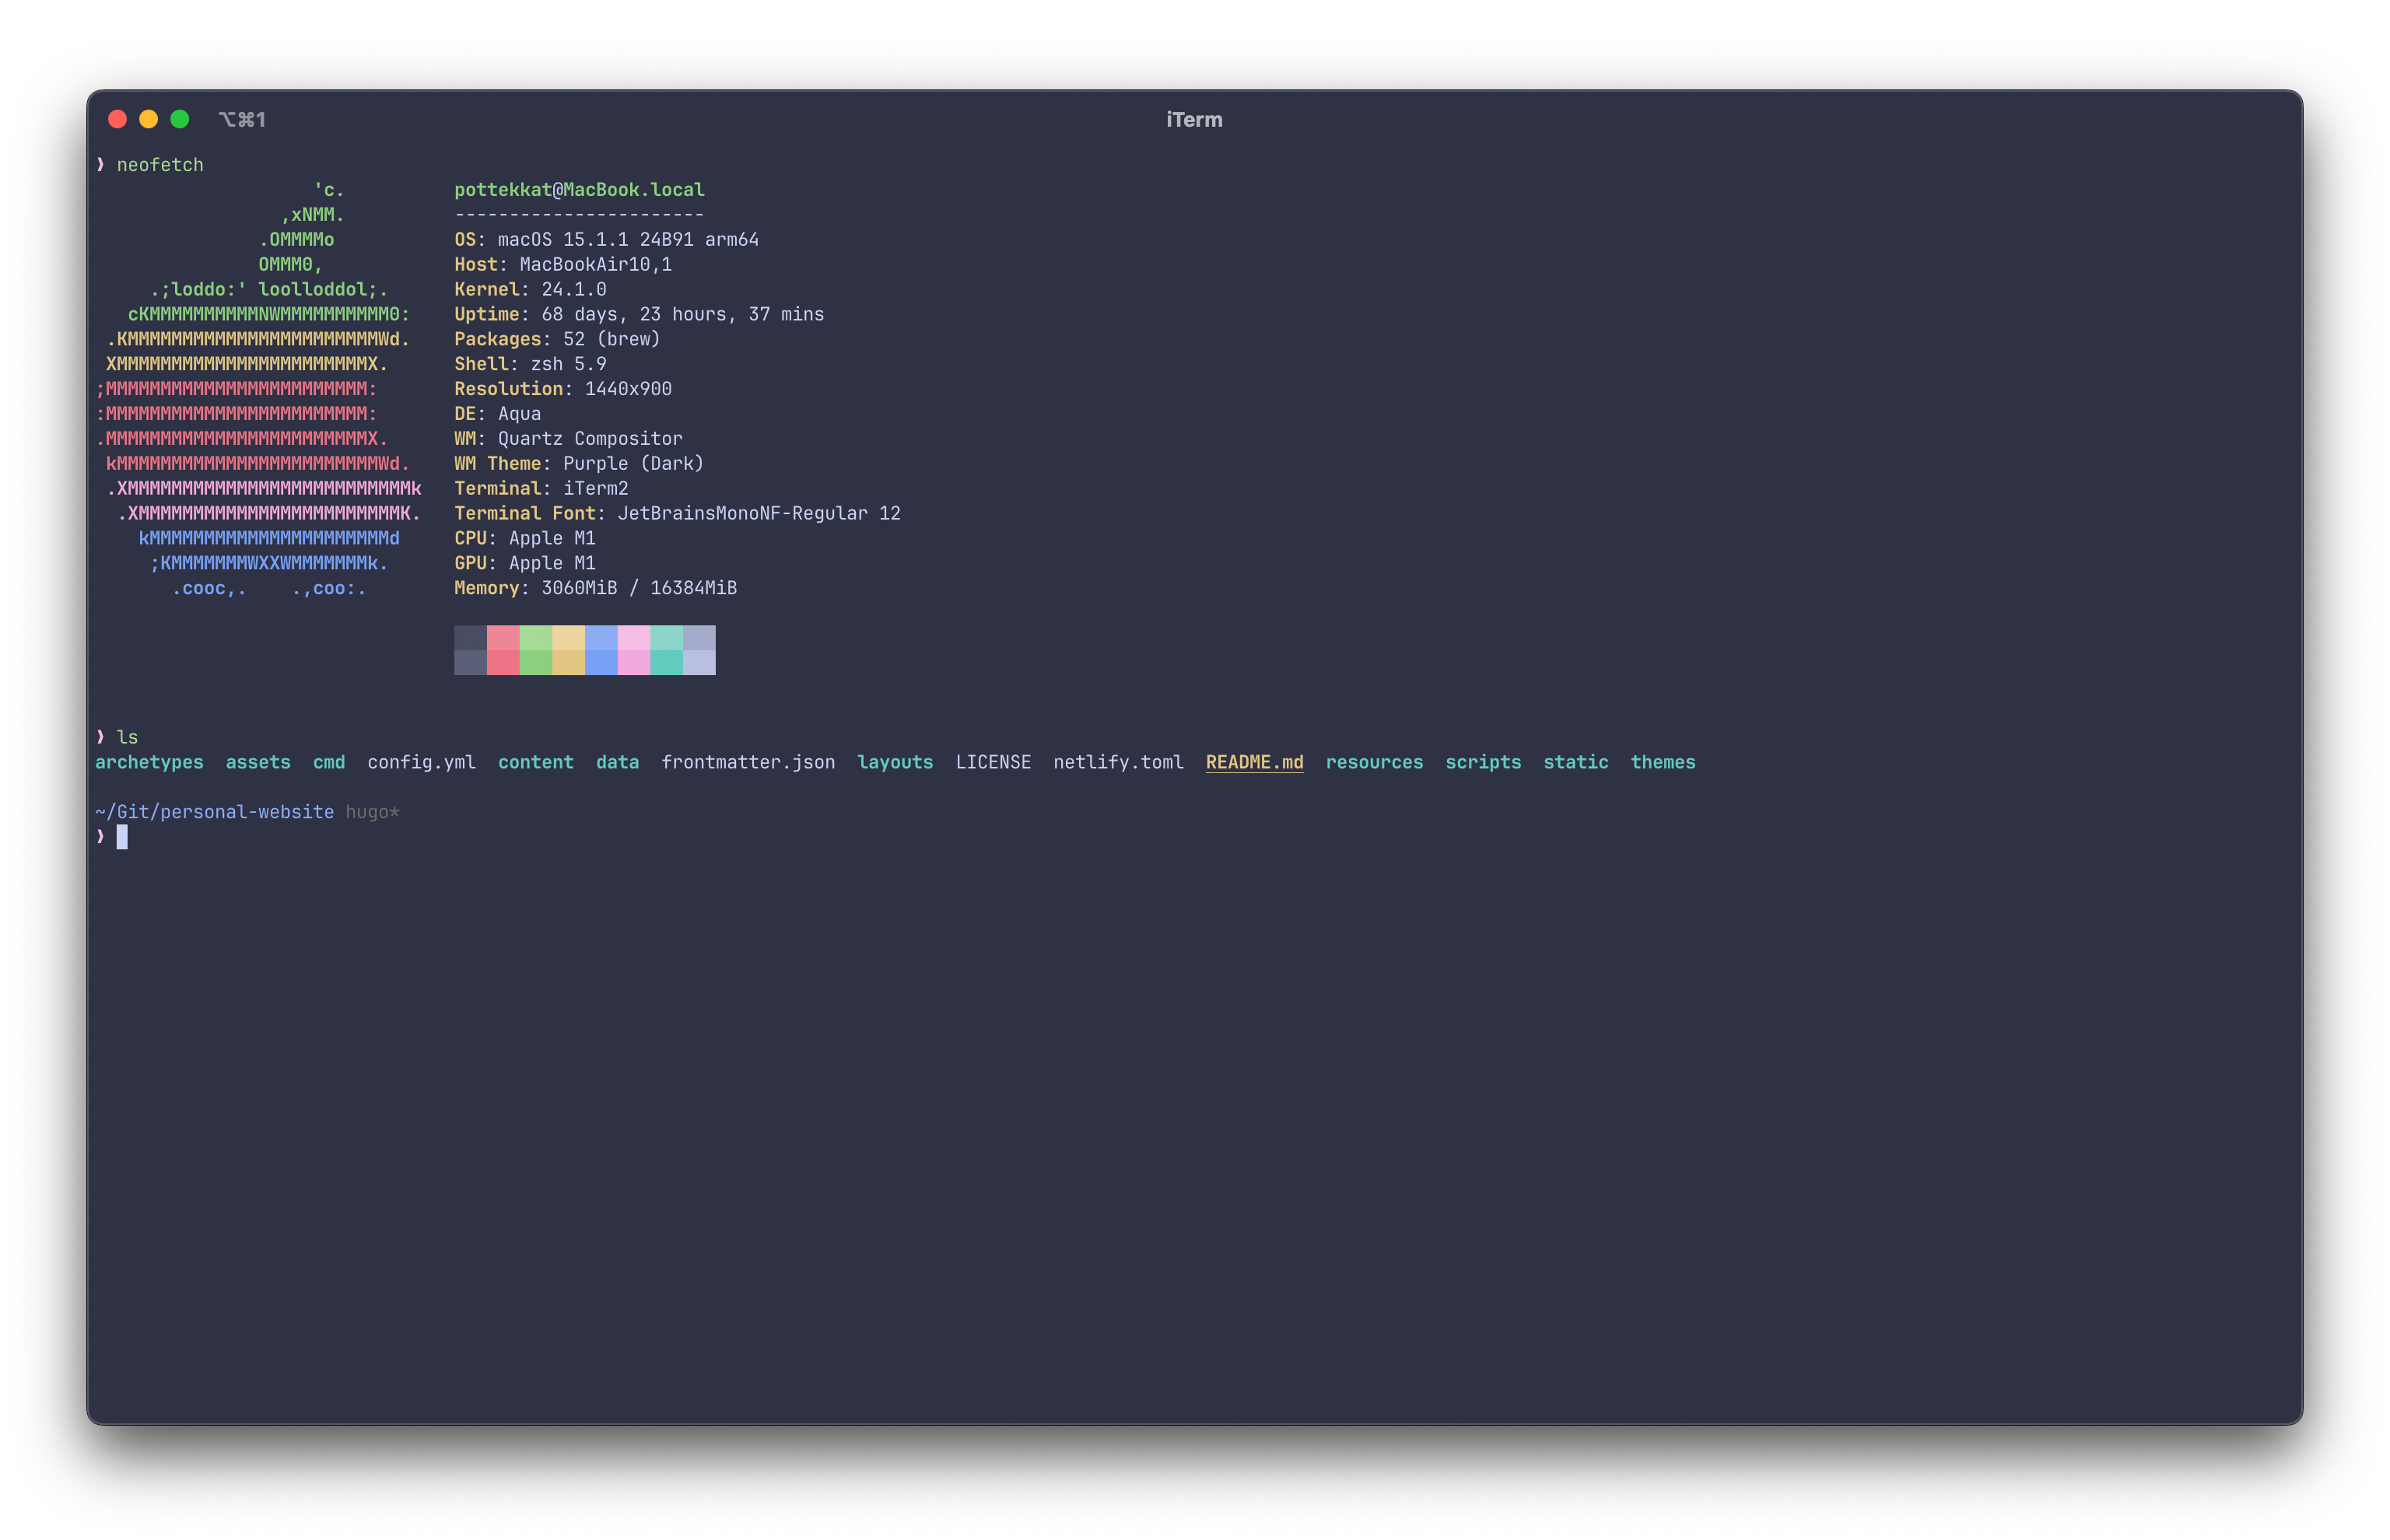
iTerm2 with Catppuccin Macchiato theme.
I also have custom key mappings to move in the terminal “naturally.” These mappings used to come as a preset, but for some reason, the preset does not work now, and you have to add it manually to your profile.
To add this is iTerm2, go to its Settings, Profiles, Keys, Key Mappings, in the Presets… dropdown, Import…, and import the following file with keymaps:
{
  "Key Mappings": {
    "0xf728-0x0": {
      "Text": "0x4",
      "Action": 11
    },
    "0xf702-0x280000": {
      "Text": "b",
      "Action": 10
    },
    "0xf702-0x300000": {
      "Text": "0x1",
      "Action": 11
    },
    "0xf703-0x280000": {
      "Text": "f",
      "Action": 10
    },
    "0xf728-0x80000": {
      "Text": "d",
      "Action": 10
    },
    "0x7f-0x100000": {
      "Text": "0x15",
      "Action": 11
    },
    "0xf703-0x300000": {
      "Text": "0x5",
      "Action": 11
    },
    "0x7f-0x80000": {
      "Version": 2,
      "Apply Mode": 0,
      "Action": 11,
      "Text": "0x17",
      "Escaping": 1
    }
  },
  "Touch Bar Items": []
}
You can also add these maps manually.
Oh My Zsh!
Once I have iTerm2 set up, I start by installing Oh My Zsh. It lets you manage your zsh configuration easily, and I have been using it forever. The quick install script makes it easy to install and get it running:
sh -c "$(curl -fsSL https://raw.githubusercontent.com/ohmyzsh/ohmyzsh/master/tools/install.sh)"
My previous theme was the default “robbyrussel” theme, but I used the Powerlevel10k theme instead this time for its performance and overall snappiness.
The rest of my .zshrc file is boilerplate and some aliases. I had a bloated .zshrc file before, so I wanted to keep things minimal this time while being functional. I’m sure this won’t remain minimal for long:
# Enable Powerlevel10k instant prompt. Should stay close to the top of ~/.zshrc.
if [[ -r "${XDG_CACHE_HOME:-$HOME/.cache}/p10k-instant-prompt-${(%):-%n}.zsh" ]]; then
  source "${XDG_CACHE_HOME:-$HOME/.cache}/p10k-instant-prompt-${(%):-%n}.zsh"
fi

# Path to your Oh My Zsh installation.
export ZSH="$HOME/.oh-my-zsh"

# Set name of the theme to load
ZSH_THEME="powerlevel10k/powerlevel10k"

zstyle ':omz:update' mode reminder  # just remind me to update when it's time

# Standard plugins can be found in $ZSH/plugins/
# Custom plugins may be added to $ZSH_CUSTOM/plugins/
plugins=(git zsh-syntax-highlighting zsh-autosuggestions)

source $ZSH/oh-my-zsh.sh

[[ ! -f ~/.p10k.zsh ]] || source ~/.p10k.zsh

export GPG_TTY=$(tty)

export NVM_DIR="$HOME/.nvm"
[ -s "$NVM_DIR/nvm.sh" ] && \. "$NVM_DIR/nvm.sh"  # This loads nvm
[ -s "$NVM_DIR/bash_completion" ] && \. "$NVM_DIR/bash_completion"  # This loads nvm bash_completion

# Mainly for tmuxinator
export EDITOR='nvim'

alias tx='tmuxinator'

# rbenv, installed through Homebrew
eval "$(rbenv init -)"

# Go
export GOPATH=$HOME/go
export PATH=$PATH:$GOPATH/bin

# Use eza instead of ls
alias ls='eza'
alias ll='eza -al --group-directories-first' # list everything, directories first
alias lh='eza -dl .*' # list hidden files
alias ld='eza -lD' # list directories only
alias lf='eza -lF --color=always | grep -v /' # list files only
alias lt='eza -al --sort=modified' # list by modification time
Homebrew
Homebrew is a package manager primarily used by macOS users. It lets you install and manage almost everything you need effortlessly. So before I started installing more stuff, I made sure to install Homebrew.
The installation script is the easiest way to install Homebrew:
/bin/bash -c "$(curl -fsSL https://raw.githubusercontent.com/Homebrew/install/HEAD/install.sh)"
Homebrew is a good enough package manager, and most, if not all, things I use, publish their own Homebrew packages.
gh CLI
Ah, the gh CLI. What started as a nice-to-have quickly became a tool I can’t live without.
As an open source maintainer, most of my time is spent navigating the GitHub UI to triage issues and work with pull requests. With the gh CLI, I can do all that in the terminal.
Using the git and gh CLI together is enough for most of my version control to stay in the terminal. With Homebrew installed, I can install the gh CLI simply by running:
brew install gh
On a side note, the gh CLI is really well-designed. I often use it as a reference when working on CLI projects. Kudos to the team!
NeoVim
In this section, I declare my dominance over my lesser peers who still click buttons like primitive cave developers. Yeah bro, “Ctrl + C, Ctrl + V” is peak efficiency.
Now, where do I start with NeoVim?
Until last year, Vim, the modal text editor, was something I would only use when SSH-ing into remote boxes. One fine day on a random YouTube rabbit hole, I was evangelized by the ways of the keyboard warriors, realized my ignorance, and learned the Vim keybindings. I haven’t looked back since my enlightenment.
I used plain old Vim for almost a year before switching to NeoVim, and it has been great. It’s fast, customizable, and, more importantly, personalizable to the finest degree—bye-bye bloated Visual Studio Code.
What they say about Vim is true. The keybindings are surprisingly easy to pick and will quickly feel natural. It makes you faster and lets you use the time you saved to rice your setup.
You can use Homebrew to install NeoVim:
brew install neovim
If you are new to Vim, learn the keybindings from any of the hundreds of videos, interactive tutorials, or articles on the Internet. If you can navigate with Vim keybindings but are new to NeoVim, I recommend watching this video by T J DeVries to get started with configuring Neovim.
My NeoVim configuration is built on kickstart.nvim, a reasonable boilerplate starter configuration, with a few additional plugins and custom keybindings.
Tmux
Tmux is another handy tool that has made my life much easier.
Everything I do, including writing code, is in the terminal. So, it makes a lot of sense to have something that can quickly spin up different environments in the terminal and switch between them. Tmux does the hard part for me.
I use it primarily to manage different development environments for my different projects. This lets me switch between projects efficiently without having to create new environments each time.
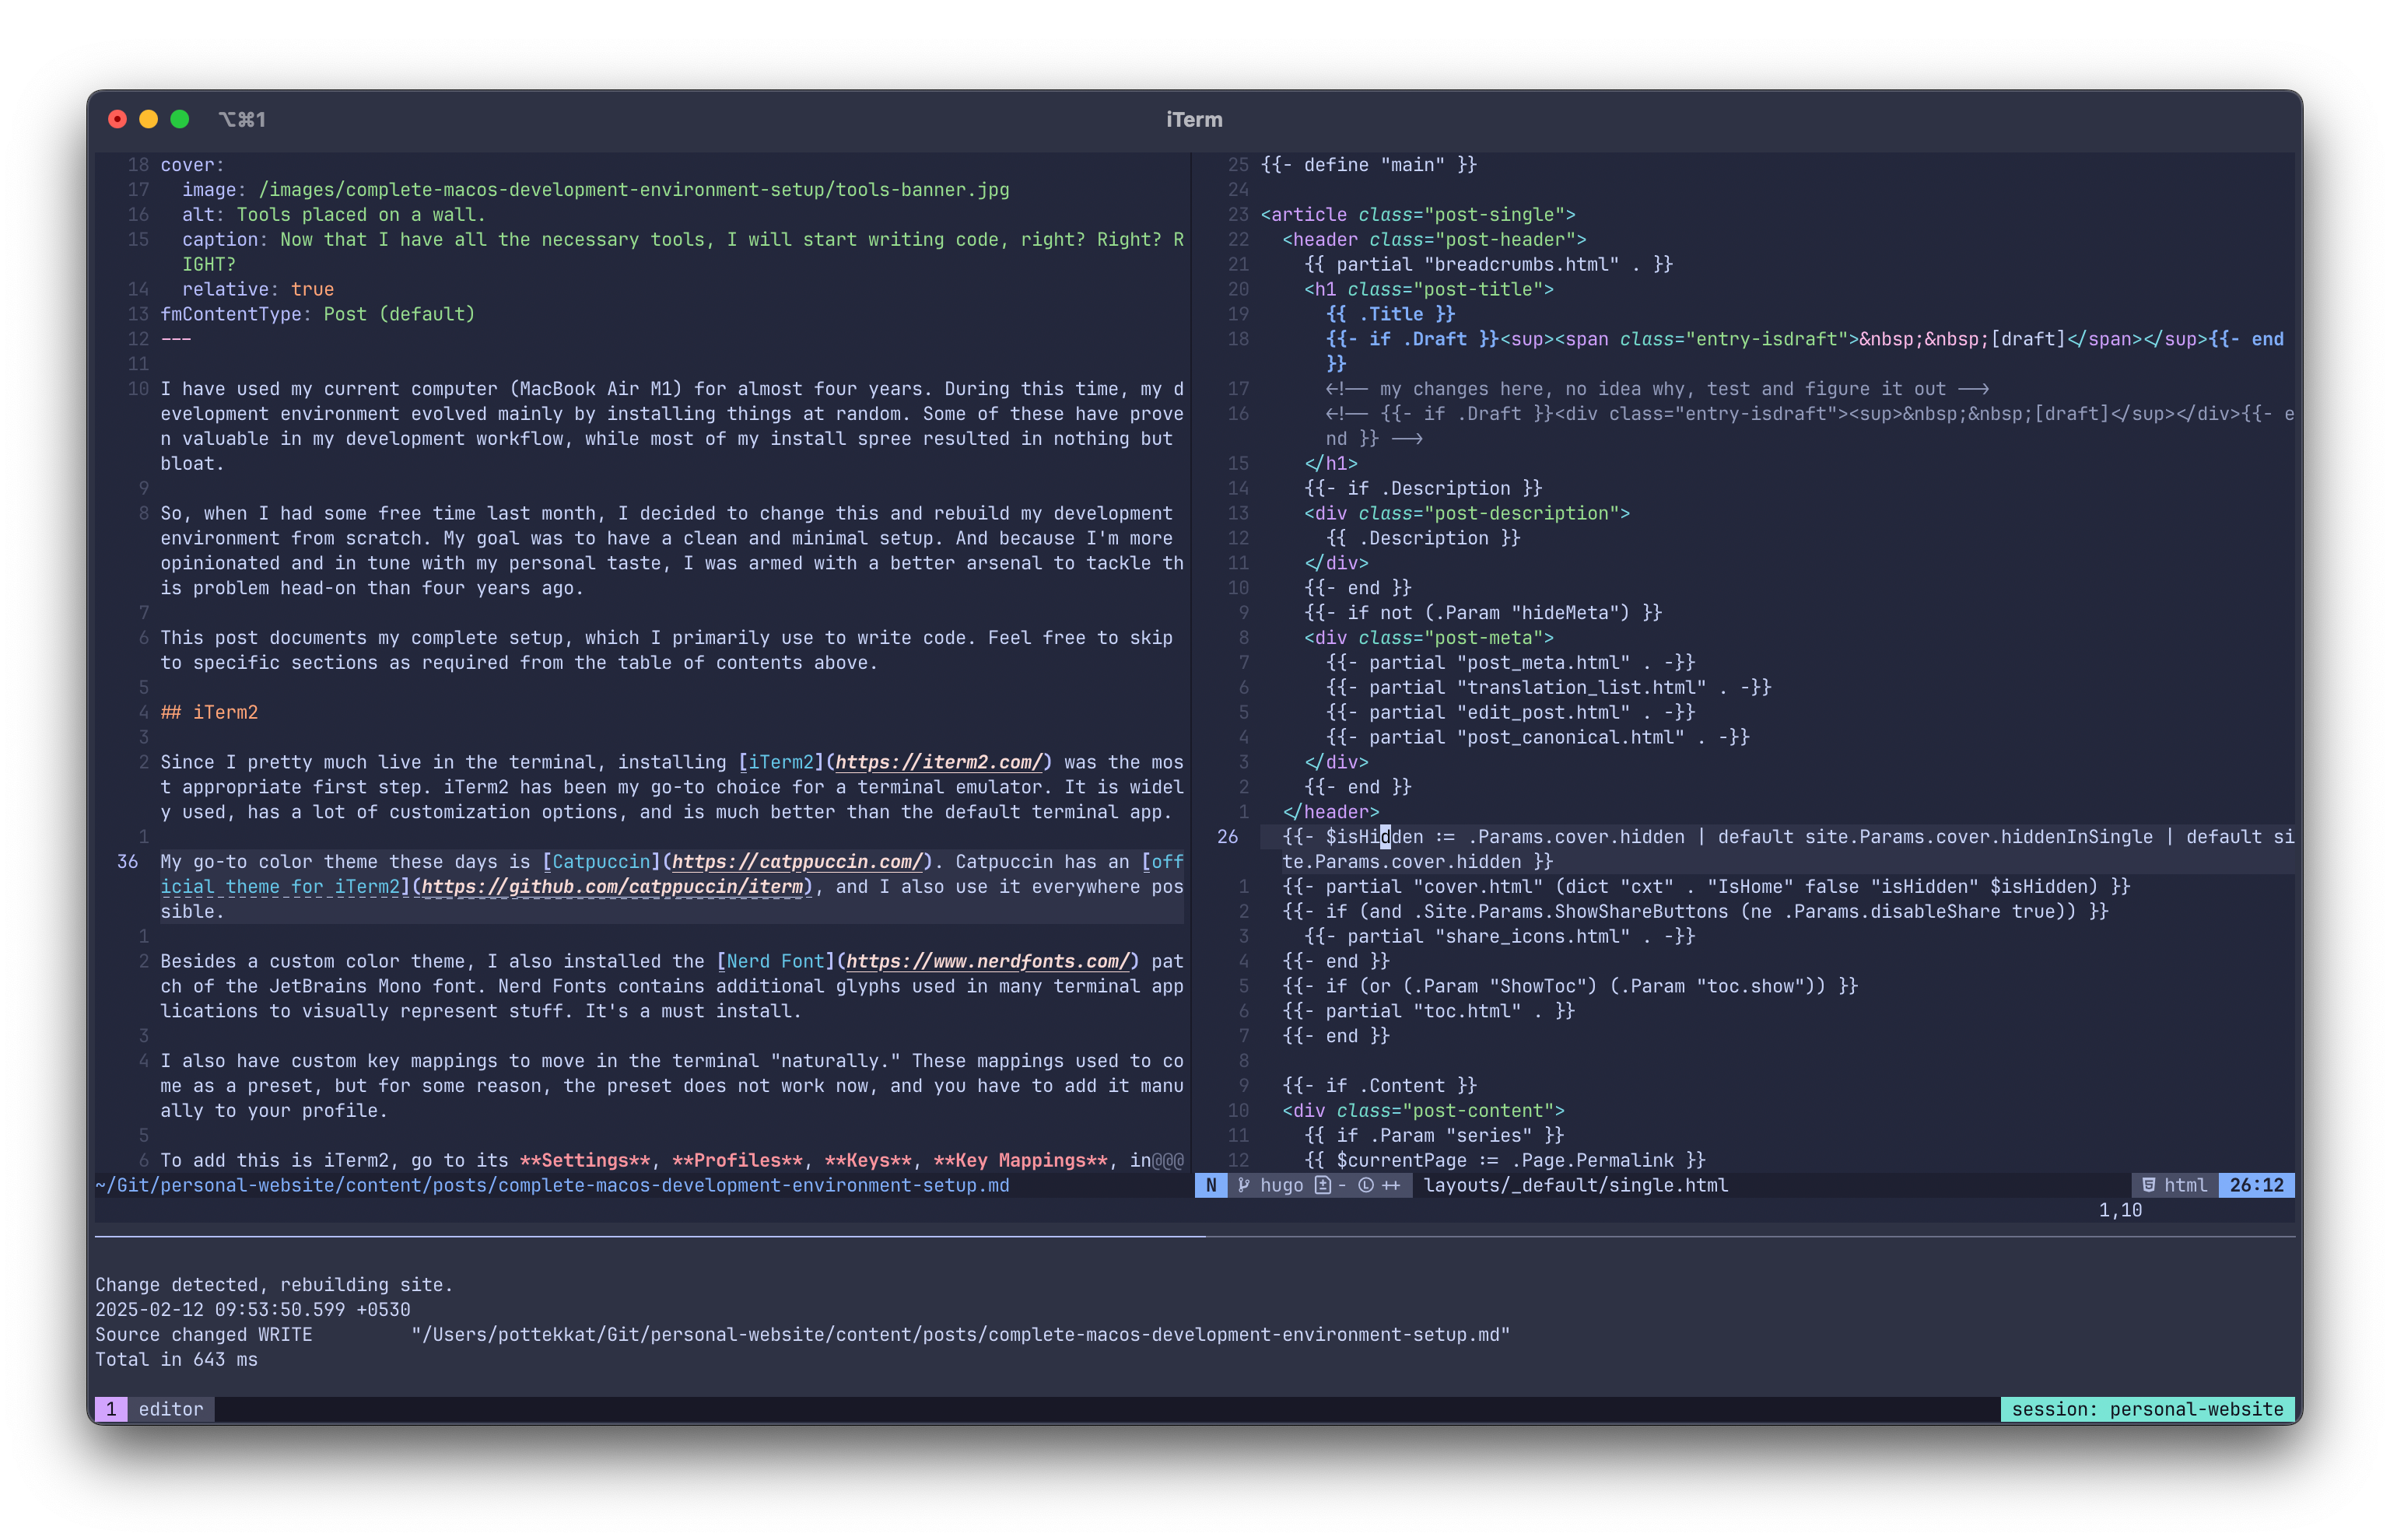
My NeoVim and Tmux setup. Minimal and functional.
Tmux has an official Homebrew package. To install it, run:
brew install tmux
To make my Tmux-based workflow smoother, I installed some plugins using the Tmux Plugin Manager (TPM). To install TPM, just clone the repository to the Tmux plugins directory (.config/tmux/plugins/):
git clone https://github.com/tmux-plugins/tpm ~/.tmux/plugins/tpm
The plugins I have installed help integrate Neovim and Tmux seamlessly. The configuration is pretty self-explanatory:
# Start numbering from 1
set -g base-index 1
set -g pane-base-index 1
set-window-option -g pane-base-index 1
set-option -g renumber-windows on

# For tmuxinator
set-option -g automatic-rename off
set-option -g allow-rename off

set -g mouse on
set -g default-terminal "tmux-256color"

# Open panes in current directory
bind '"' split-window -v -c "#{pane_current_path}"
bind % split-window -h -c "#{pane_current_path}"

# List of plugins
set -g @plugin 'tmux-plugins/tpm'
set -g @plugin 'tmux-plugins/tmux-sensible'
set -g @plugin 'christoomey/vim-tmux-navigator'

# Theme
set -g @plugin 'catppuccin/tmux'
set -g @catppucin_flavor 'macchiato'

set -g @catppuccin_window_status_style "basic"
set -g status-right-length 100
set -g status-left-length 100
set -g status-left ""
set -g status-right '#[fg=#{@thm_crust},bg=#{@thm_teal}] session: #S '

# Initialize TMUX plugin manager (keep this line at the very bottom of tmux.conf)
run '~/.tmux/plugins/tpm/tpm'
Finally, my Tmux setup feels incomplete without Tmuxinator, a tool that lets me configure reproducible Tmux sessions using YAML. For example, I have a Tmuxinator configuration to start a session with a development environment for my personal website. Tmuxinator will instruct Tmux to create a new session with an editor pane running NeoVim and a terminal running the hugo build command:
# /Users/pottekkat/.config/tmuxinator/personal-website.yml

name: personal-website
root: ~/Git/personal-website/

windows:
  - editor:
      layout: 44d4,179x61,0,0[179x51,0,0,8,179x9,0,52,9]
      panes:
        - editor:
          - nvim
        - server:
          - hugo server -D --buildFuture
I usually have multiple Tmux sessions running different things that I switch between. I can attach to these sessions anytime, even after I close my terminal. Pretty neat if you ask me.
Orbstack
Most of my work requires building and running Docker containers. While Docker Desktop has been the unanimous choice for most developers, including me, a switch to Orbstack, its lightweight alternative means no going back.
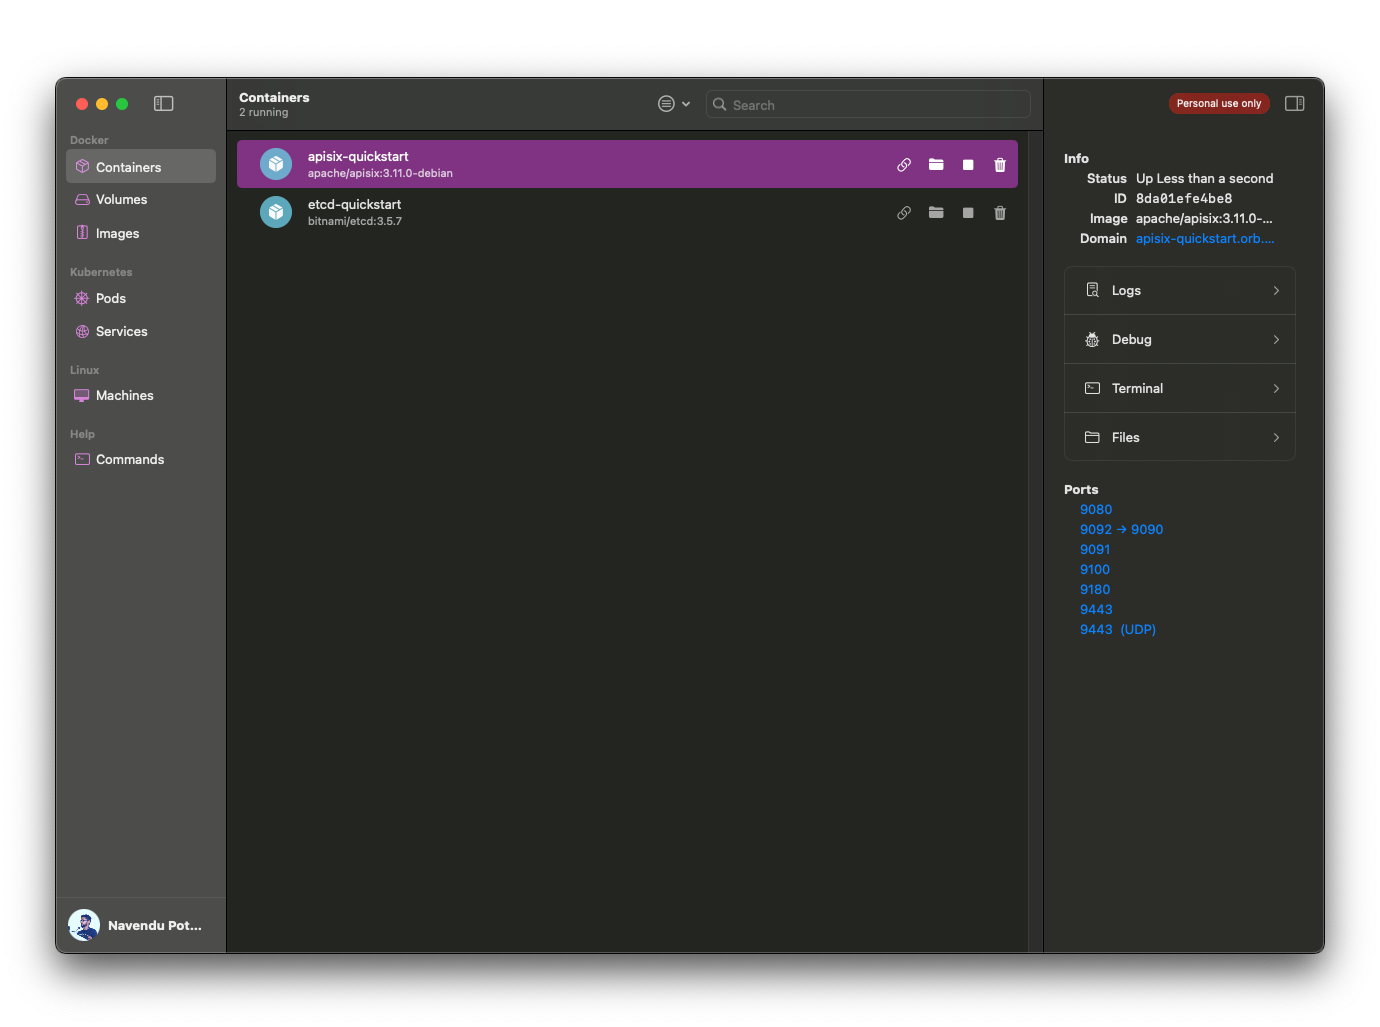
Does everything I want with Docker containers, faster.
It’s free for personal use. It’s faster. It’s lighter. I can run multiple containers now without worrying about performance. It can also provision a Kubernetes cluster similar to Docker Desktop, which is handy when I work on Kubernetes-related projects.
Further Improvements
I’m sure there’s a lot I can do to improve my setup. But instead of forcing it, I think it’s better if it happens naturally—as it will.
Right now, the setup is relatively lightweight and helps me work better. While there’s room for improvement, focusing on it endlessly can quickly become counter productive and hinder my work.
Still, one of the most immediate improvements I can think of would be using GNU Stow or something similar to save and track my configuration changes and reuse them on new machines.
I have been trying out Ghostty as my terminal emulator since it made public beta. It has some issues with text rendering on my low pixel-density monitor (very likely to be my skill issue), which iTerm2 doesn’t. So, I’m sticking to what works until it’s fixed or until I splurge on a good programming monitor.