

This article is a part of the series "Hands-On With Apache APISIX Ingress."
Other articles in the series:
- Set Up Ingress on Kubernetes With Apache APISIX Ingress Controller
- Canary Release in Kubernetes With Apache APISIX Ingress
- Extending Apache APISIX Ingress with Annotations, CRDs, and Plugins
- Kubernetes Gateway API With APISIX Ingress
- Custom Plugins in APISIX Ingress
- Accessing External Services through APISIX Ingress
- Batching Requests in APISIX Ingress
A canary release is a process of rolling out a new version of software to a small subset of users before making it generally available. Canary releases can help in testing and controlling new releases and rolling back if there are any issues.
A simple canary release looks like this:
In this hands-on tutorial, we will set up a canary release in Kubernetes using Apache APISIX Ingress.
Before you move on, make sure you:
- Go through the previous tutorial for an introduction to Apache APISIX Ingress.
- Have access to a Kubernetes cluster. This tutorial uses minikube for creating a cluster.
- Install and configure
kubectlto communicate with your cluster. - Install Helm to deploy the APISIX Ingress controller.
Deploying a Sample Application
As in the previous tutorial, we will use our sample HTTP server application, the bare-minimum-api. This will act as our versioned service:
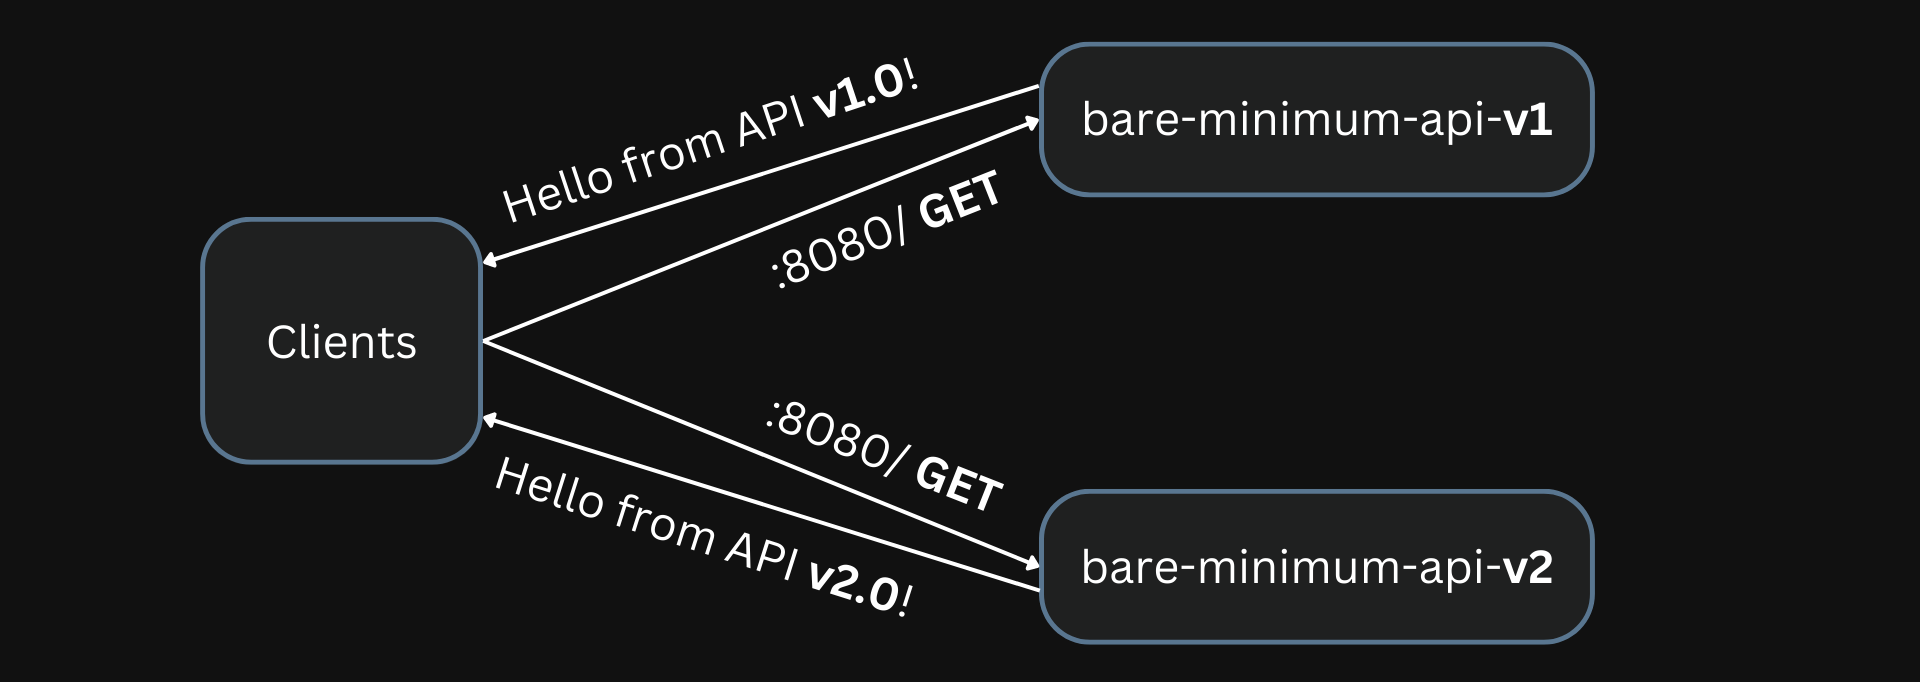
To deploy the two “versions” of the application, you can run:
kubectl run bare-minimum-api-v1 --image navendup/bare-minimum-api --port 8080 -- 8080 v1.0
kubectl expose pod bare-minimum-api-v1 --port 8080
kubectl run bare-minimum-api-v2 --image navendup/bare-minimum-api --port 8080 -- 8080 v2.0
kubectl expose pod bare-minimum-api-v2 --port 8080
We will now deploy APISIX Ingress and set up a canary release.
Deploying APISIX Ingress
You can install APISIX and APISIX Ingress controller using Helm:
helm repo add apisix https://charts.apiseven.com
helm repo add bitnami https://charts.bitnami.com/bitnami
helm repo update
kubectl create ns ingress-apisix
helm install apisix apisix/apisix \
  --set gateway.type=NodePort \
  --set ingress-controller.enabled=true \
  --namespace ingress-apisix \
  --set ingress-controller.config.apisix.serviceNamespace=ingress-apisix
kubectl get pods --namespace ingress-apisix
Once all the pods and services are running, you can test APISIX by accessing the Admin API:
kubectl exec -n ingress-apisix deploy/apisix -- curl -s http://127.0.0.1:9180/apisix/admin/routes -H 'X-API-Key: edd1c9f034335f136f87ad84b625c8f1'
If you get a response similar to the one shown below, APISIX is up and running:
{
  "action": "get",
  "node": {
    "key": "/apisix/routes",
    "dir": true,
    "nodes": []
  },
  "count": 0
}
To access the Ingress, you can run:
minikube service apisix-gateway --url -n ingress-apisix
You need to keep it running depending on your operating system. Regardless, you will see the IP address of APISIX Ingress. You can then send requests to this address.
http://127.0.0.1:56194
❗  Because you are using a Docker driver on darwin, the terminal needs to be open to run it.
NOTE
See the previous tutorial to learn more.
Configuring Canary Release
After verifying that APISIX Ingress is running, you can configure a canary release with APISIX's CRDs.
We will set weights for each service to route traffic proportionately.
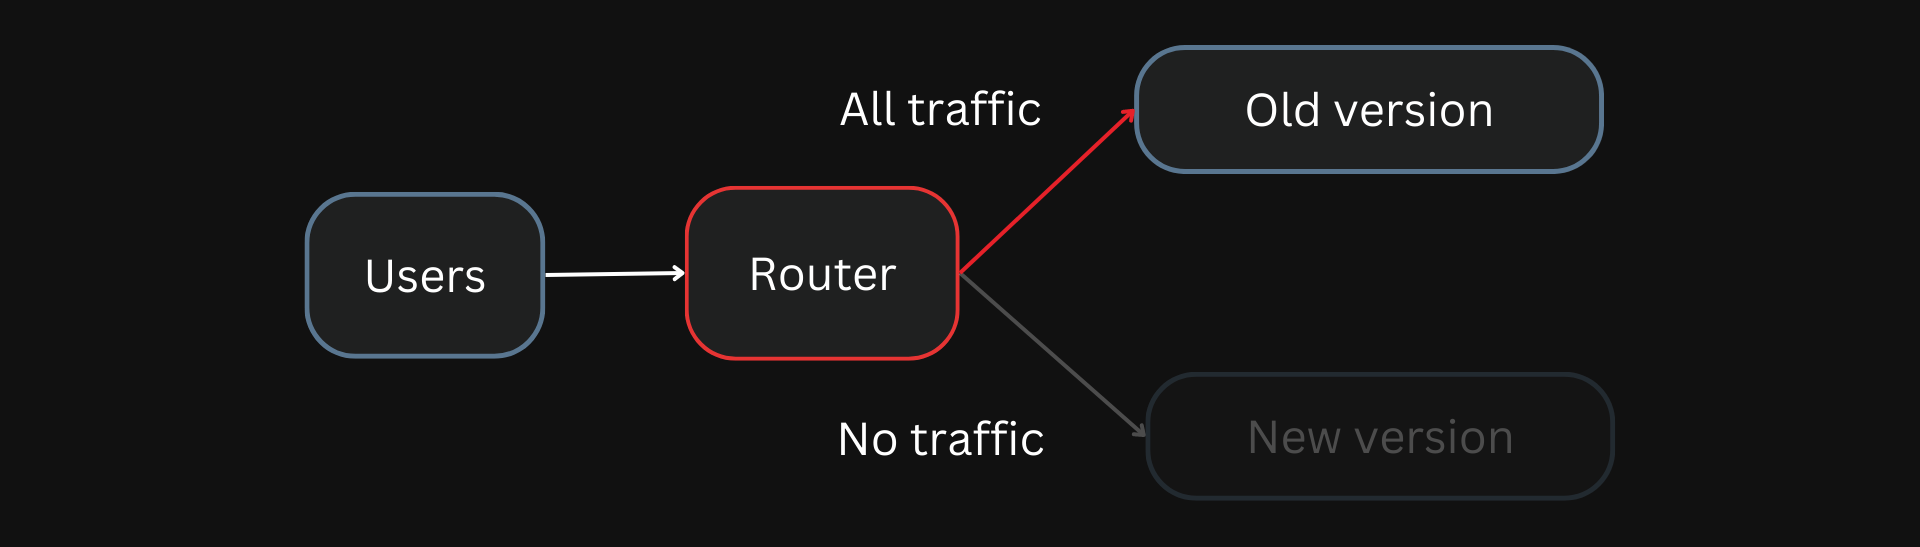
Initially, we want to route all requests to the old version of the service:
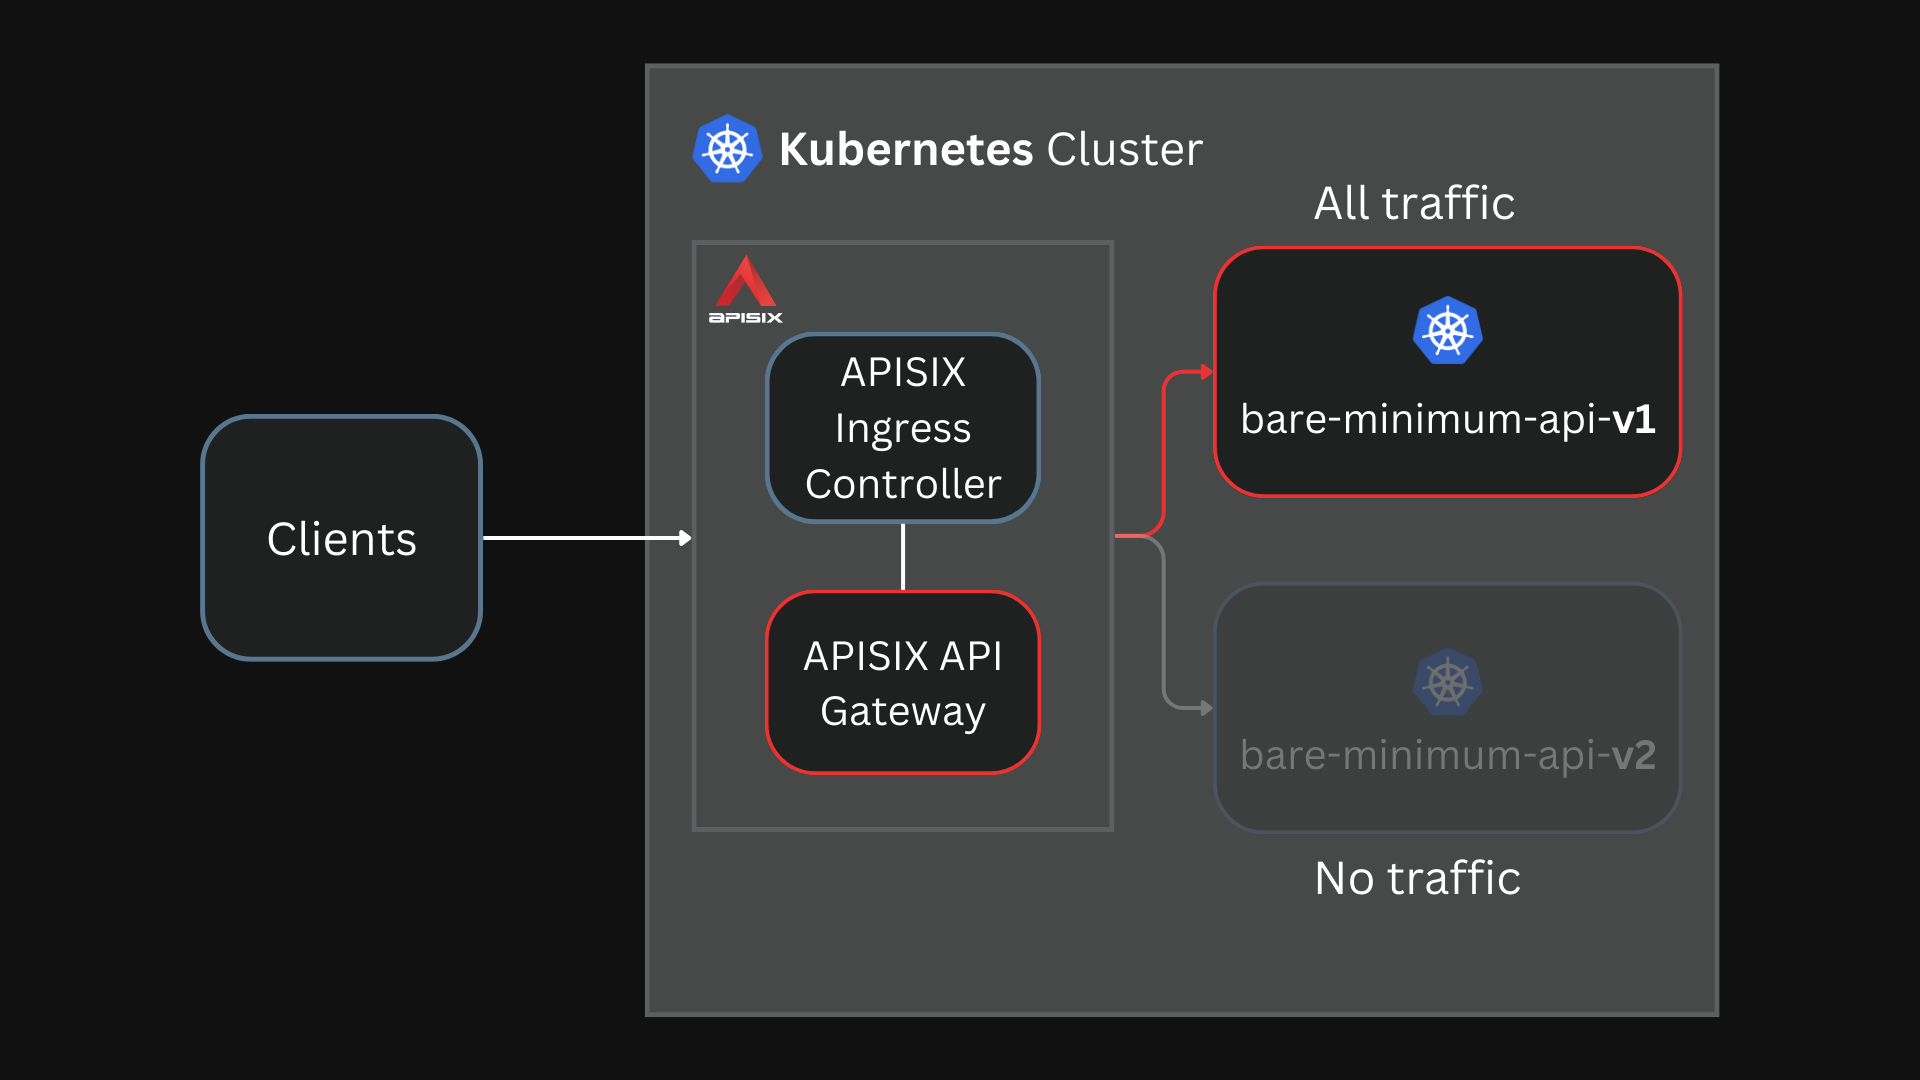
To configure this, we can set the weight to 100 and 0 for the bare-minimum-api-v1 and bare-minimum-api-v2 services, respectively:
apiVersion: apisix.apache.org/v2
kind: ApisixRoute
metadata:
  name: canary-release
spec:
  http:
    - name: route-v1
      match:
        paths:
          - /*
      backends:
        - serviceName: bare-minimum-api-v1
          servicePort: 8080
          weight: 100
        - serviceName: bare-minimum-api-v2
          servicePort: 8080
          weight: 0
You can apply it to your cluster by running:
kubectl apply -f canary-release.yaml
This will route all traffic to the bare-minimum-api-v1 service. You can test it out by sending a request:
curl http://127.0.0.1:56194/
NOTE
This address is the address of your APISIX Ingress obtained by running
minikube service apisix-gateway --url -n ingress-apisixon the installation step.
If you keep sending multiple requests, you will see that the response is only from bare-minimum-api-v1:
➜ curl http://127.0.0.1:56194/
Hello from API v1.0!
➜ curl http://127.0.0.1:56194/
Hello from API v1.0!
➜ curl http://127.0.0.1:56194/
Hello from API v1.0!
➜ curl http://127.0.0.1:56194/
Hello from API v1.0!
➜ curl http://127.0.0.1:56194/
Hello from API v1.0!
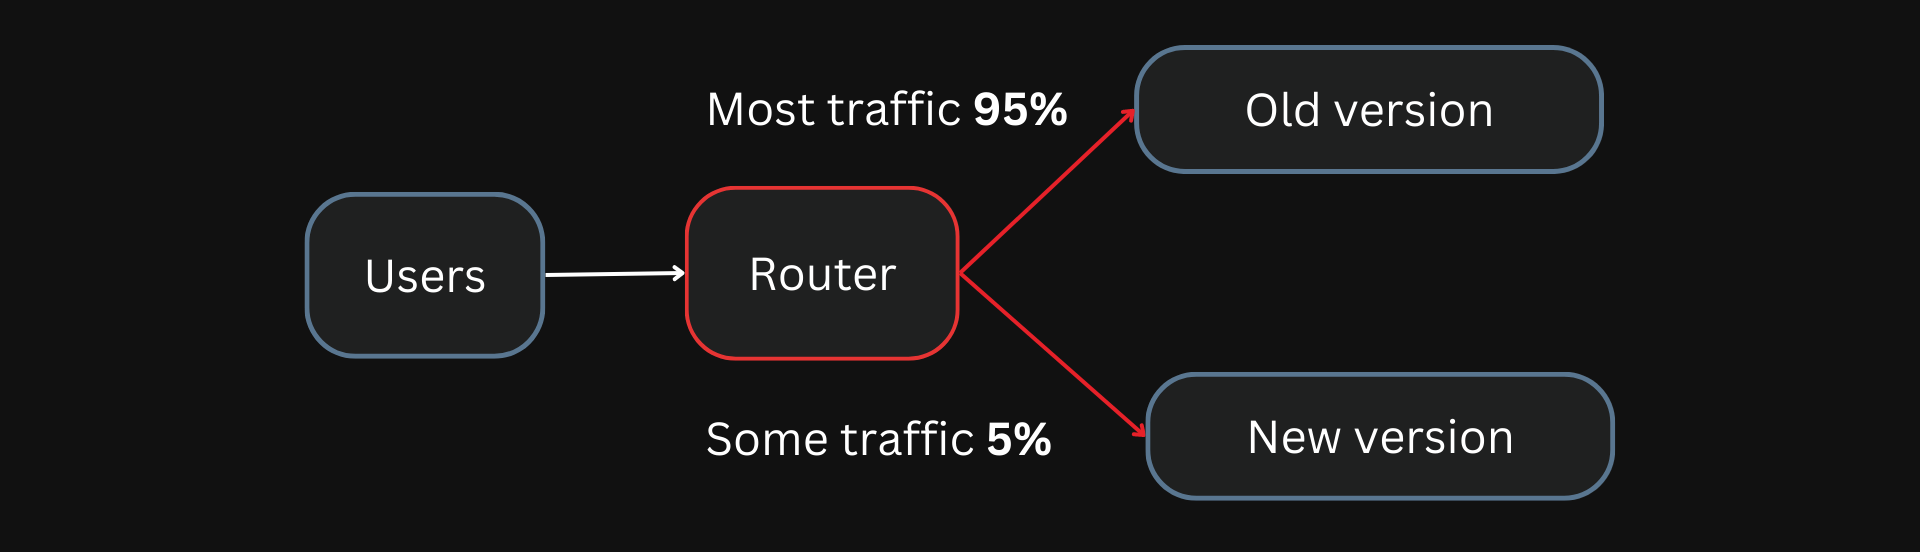
Now, you can change the configuration to route some traffic, say 5%, to the new version, bare-minimum-api-v2:
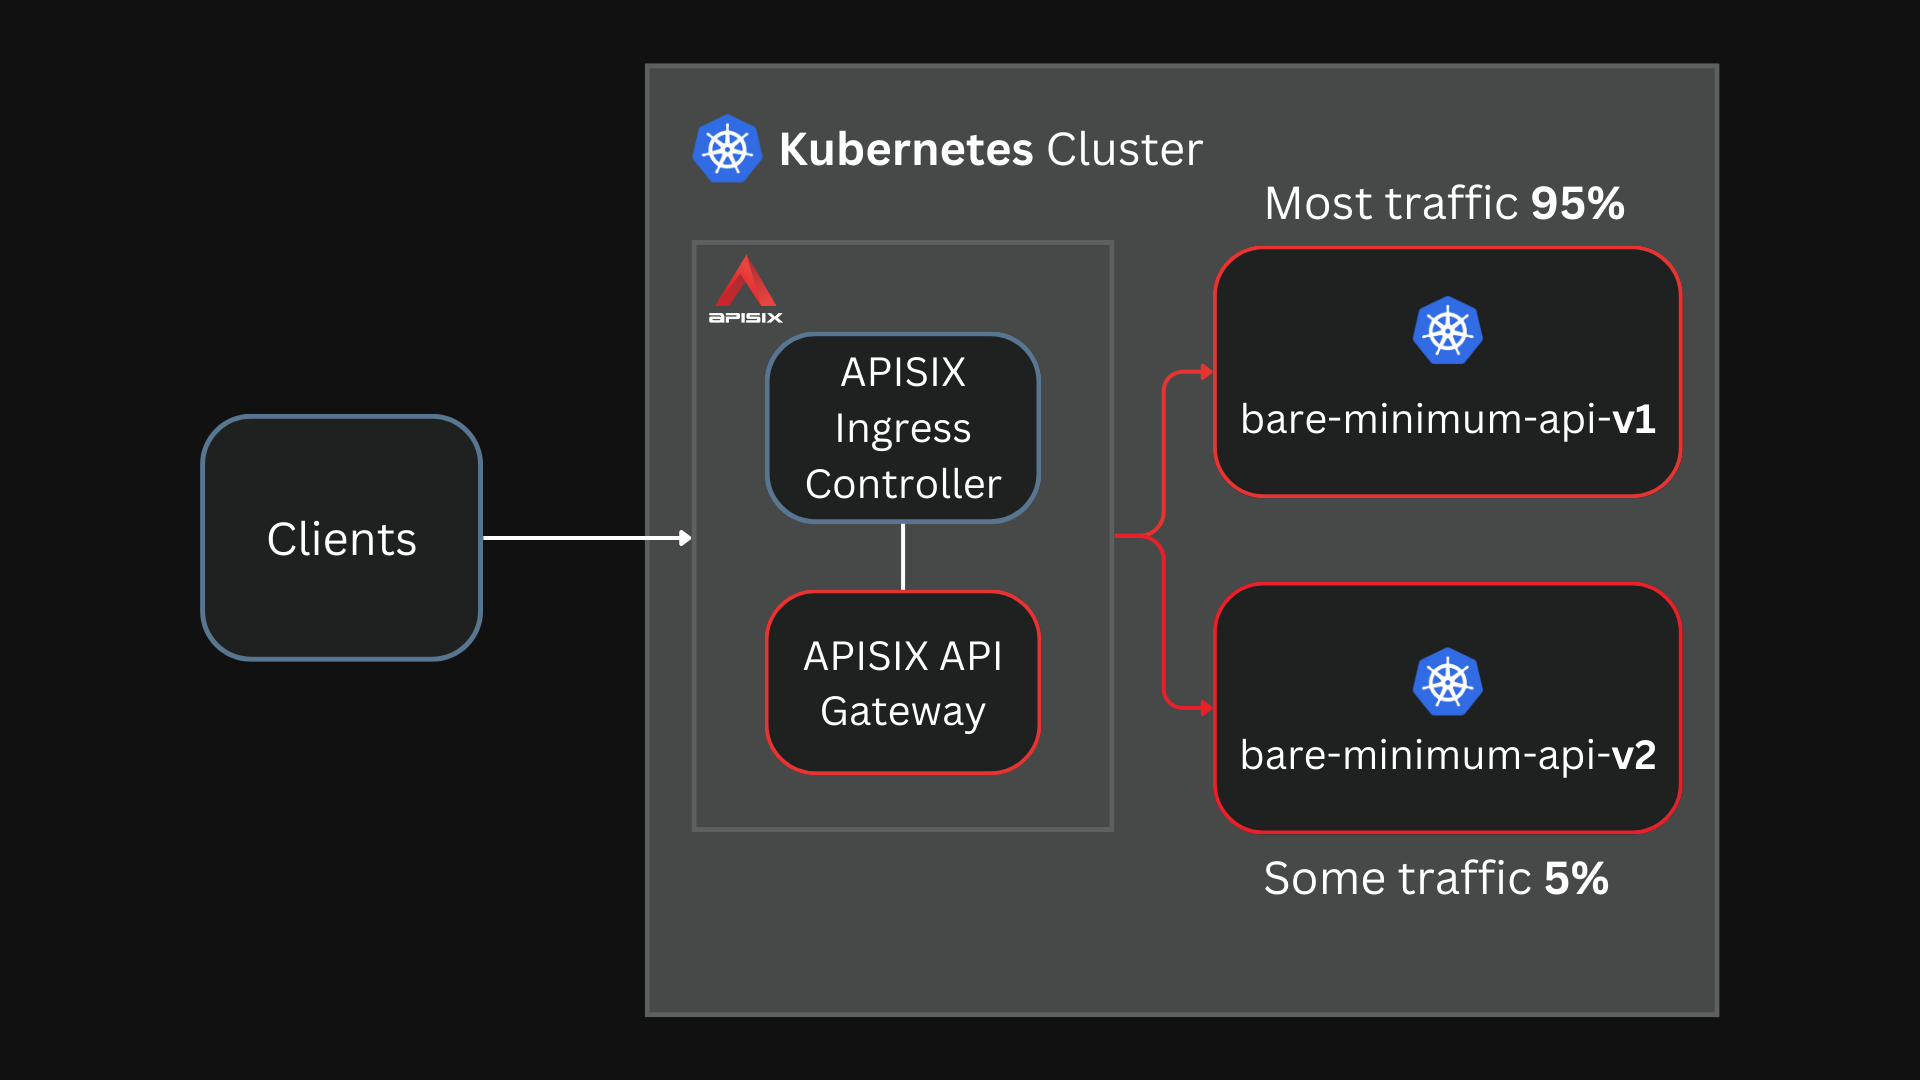
You can configure this by editing your manifest file and applying it to your cluster:
apiVersion: apisix.apache.org/v2
kind: ApisixRoute
metadata:
  name: canary-release
spec:
  http:
    - name: route-v1
      match:
        paths:
          - /*
      backends:
        - serviceName: bare-minimum-api-v1
          servicePort: 8080
          weight: 95
        - serviceName: bare-minimum-api-v2
          servicePort: 8080
          weight: 5
APISIX will hot-reload the new configuration without needing to be restarted.
Now, if you send requests to the Ingress controller, you will see that some of the requests (5%) are routed to the bare-minimum-api-v2 service:
➜ curl http://127.0.0.1:56194/
Hello from API v1.0!
➜ curl http://127.0.0.1:56194/
Hello from API v1.0!
➜ curl http://127.0.0.1:56194/
Hello from API v1.0!
➜ curl http://127.0.0.1:56194/
Hello from API v1.0!
➜ curl http://127.0.0.1:56194/
Hello from API v1.0!
➜ curl http://127.0.0.1:56194/
Hello from API v2.0!
➜ curl http://127.0.0.1:56194/
Hello from API v1.0!
➜ curl http://127.0.0.1:56194/
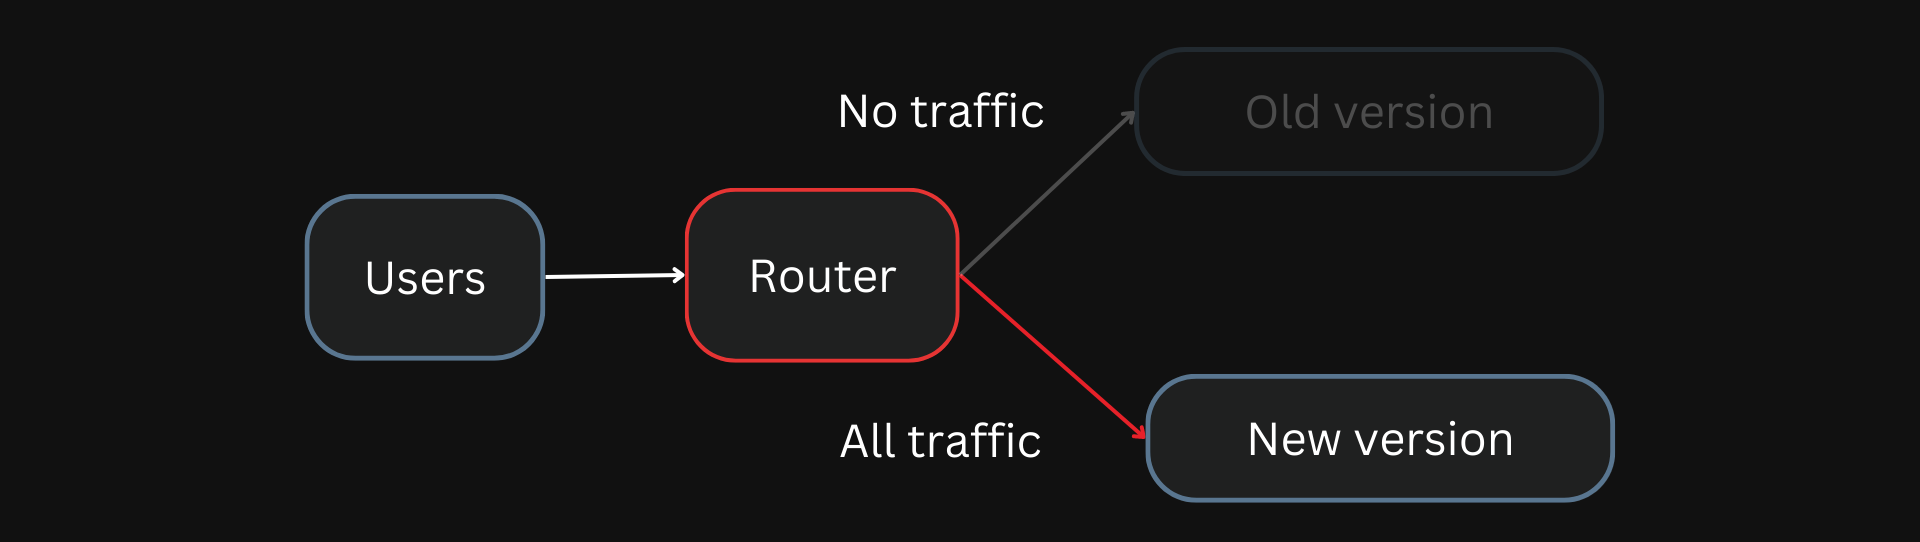
Hello from API v1.0!Finally, you can route all traffic to the new version of the service.
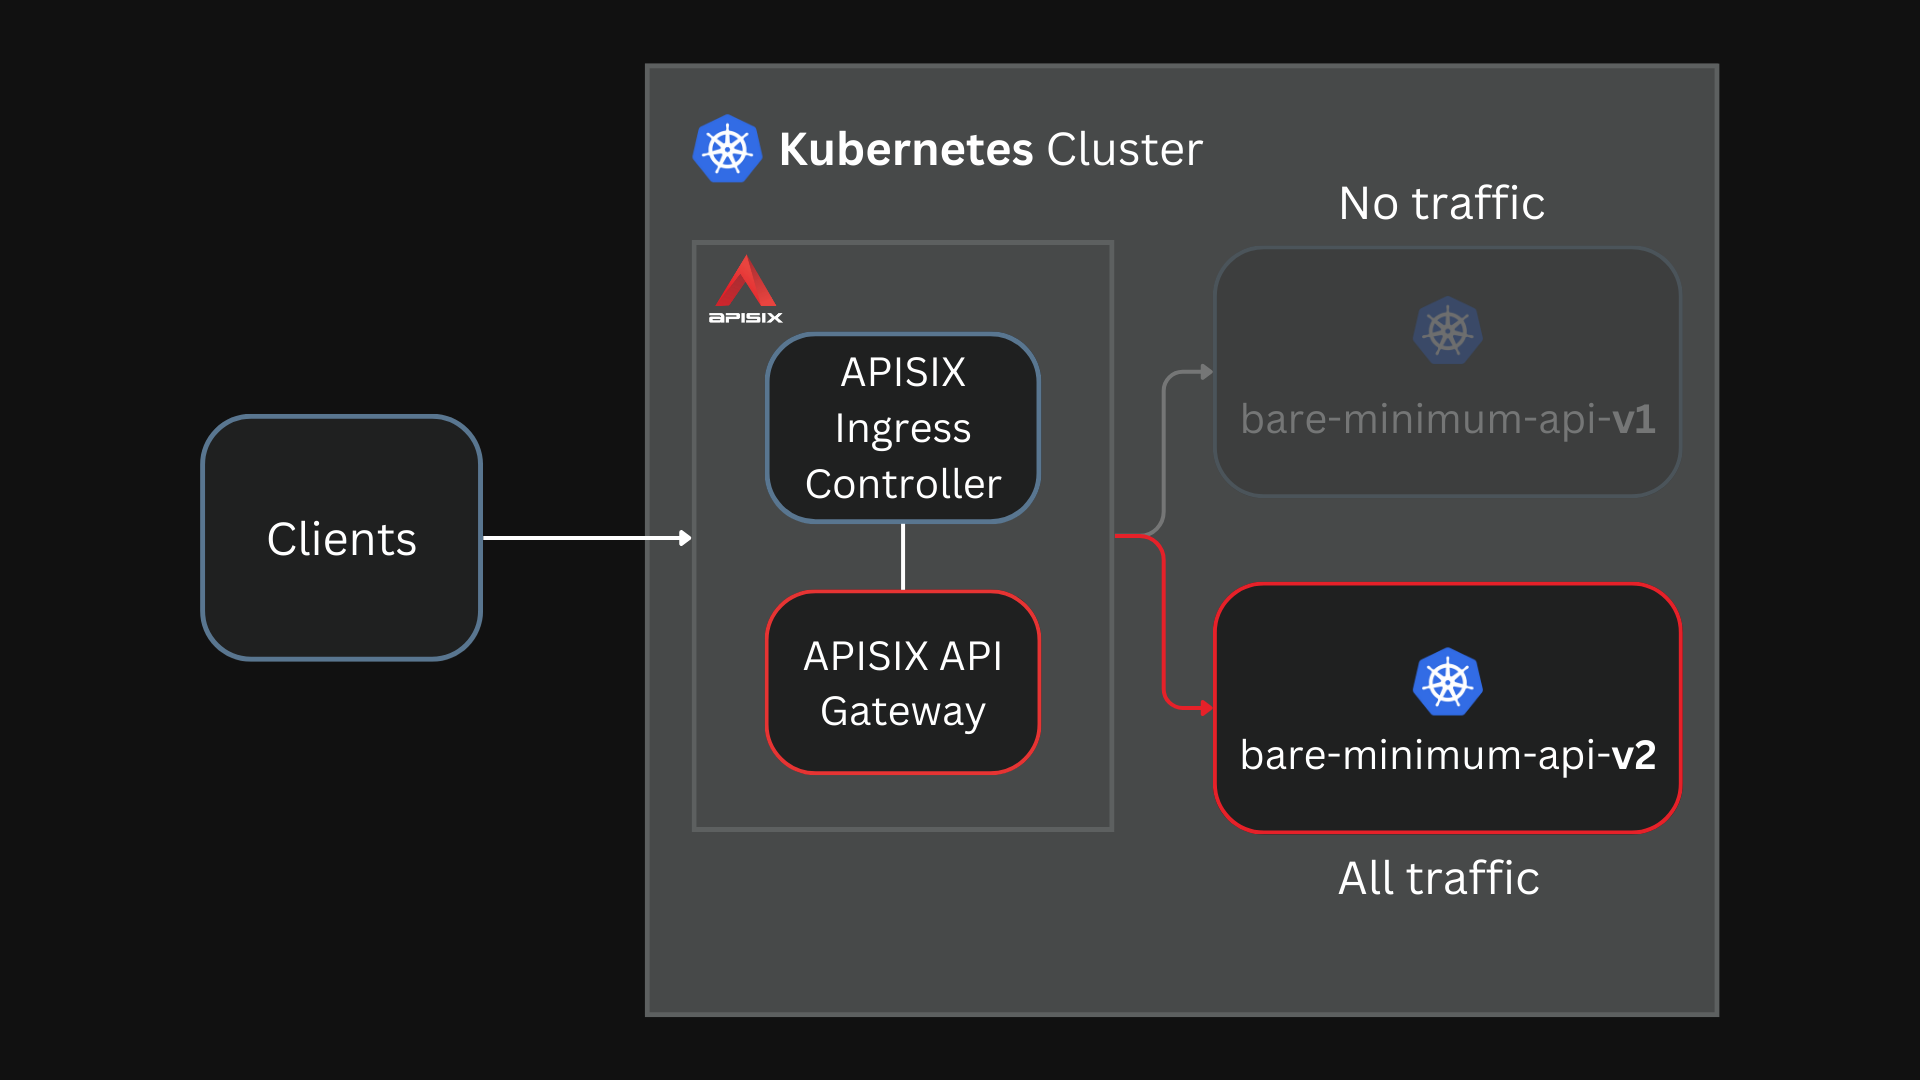
To configure this, you can set the weight to 0 for the bare-minimum-api-v1 service and 100 for the bare-minimum-api-v2 service:
apiVersion: apisix.apache.org/v2
kind: ApisixRoute
metadata:
  name: canary-release
spec:
  http:
    - name: route-v1
      match:
        paths:
          - /*
      backends:
        - serviceName: bare-minimum-api-v1
          servicePort: 8080
          weight: 0
        - serviceName: bare-minimum-api-v2
          servicePort: 8080
          weight: 100
Now, if you send requests, you will see that all requests are routed to bare-minimum-api-v2:
➜ curl http://127.0.0.1:56194/
Hello from API v2.0!
➜ curl http://127.0.0.1:56194/
Hello from API v2.0!
➜ curl http://127.0.0.1:56194/
Hello from API v2.0!
➜ curl http://127.0.0.1:56194/
Hello from API v2.0!
➜ curl http://127.0.0.1:56194/
Hello from API v2.0!
➜ curl http://127.0.0.1:56194/
Hello from API v2.0!
You successfully migrated your users from the old version of your service to your new version without any downtime!
In real-world scenarios, you can keep the older version of the service on standby to roll back if there are any issues.
What’s Next?
This tutorial taught you how to configure APISIX Ingress for simple canary releases. We tested it out with our sample application.
You can also configure complex release strategies with APISIX and its Plugins. I will try to cover these in the following articles. To learn more about APISIX, visit apisix.apache.org.
See the complete list of articles in the series “Hands-On With Apache APISIX Ingress”.